4. Deploy a Model
To use Audio Transcription on macOS while installing Link from source, you need CMake installed. You can install it with Homebrew:
brew install cmake
Once your device is registered and online, you can deploy a model from the Loc.ai Model Library. Deployments push a model to one or more devices, where Loc.ai:Link downloads and prepares it for local inference.
You can deploy your custom models that you have uploaded to the platform, or select from a collection of globally shared pre-built models that are ready to run on your devices. After deployment, you can start running inferences locally on the edge and receive results in real-time on your dashboard.
Let's go through the both deployment options:
A. Deploy Globally Shared Models (pre-built models)
The Loc.ai Model Library includes a collection of globally shared pre-built models that are ready to deploy and run on your devices. These models cover common use cases such as image classification, object detection, audio recognition, and language processing.
Steps to Deploy a Globally Shared Model
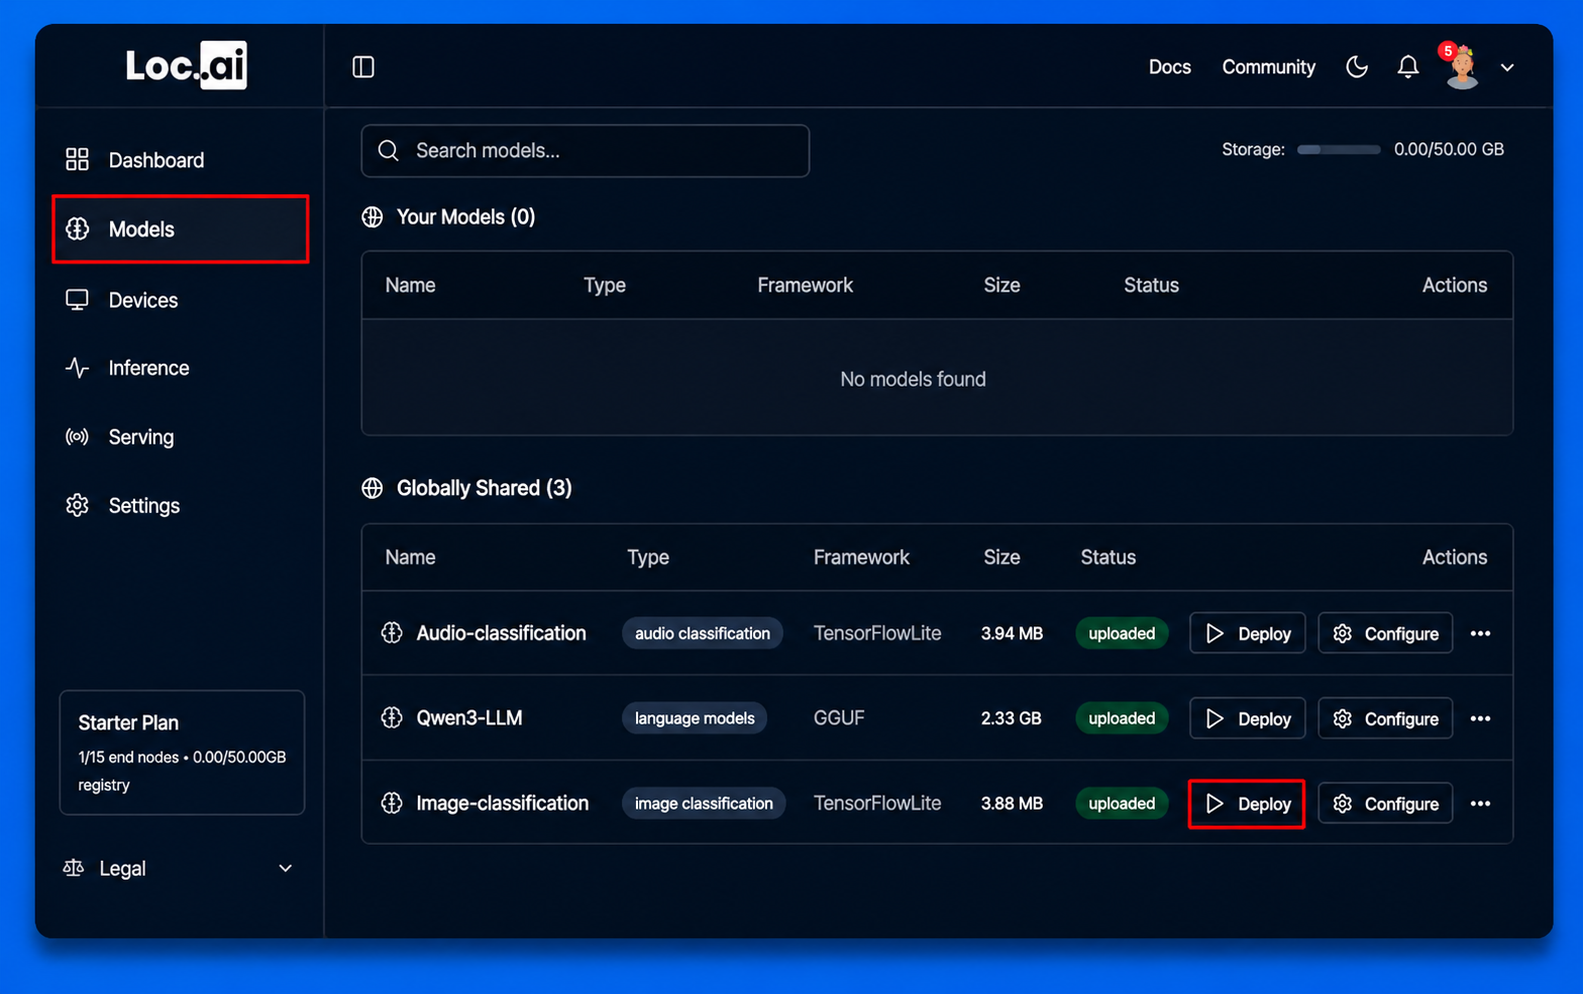
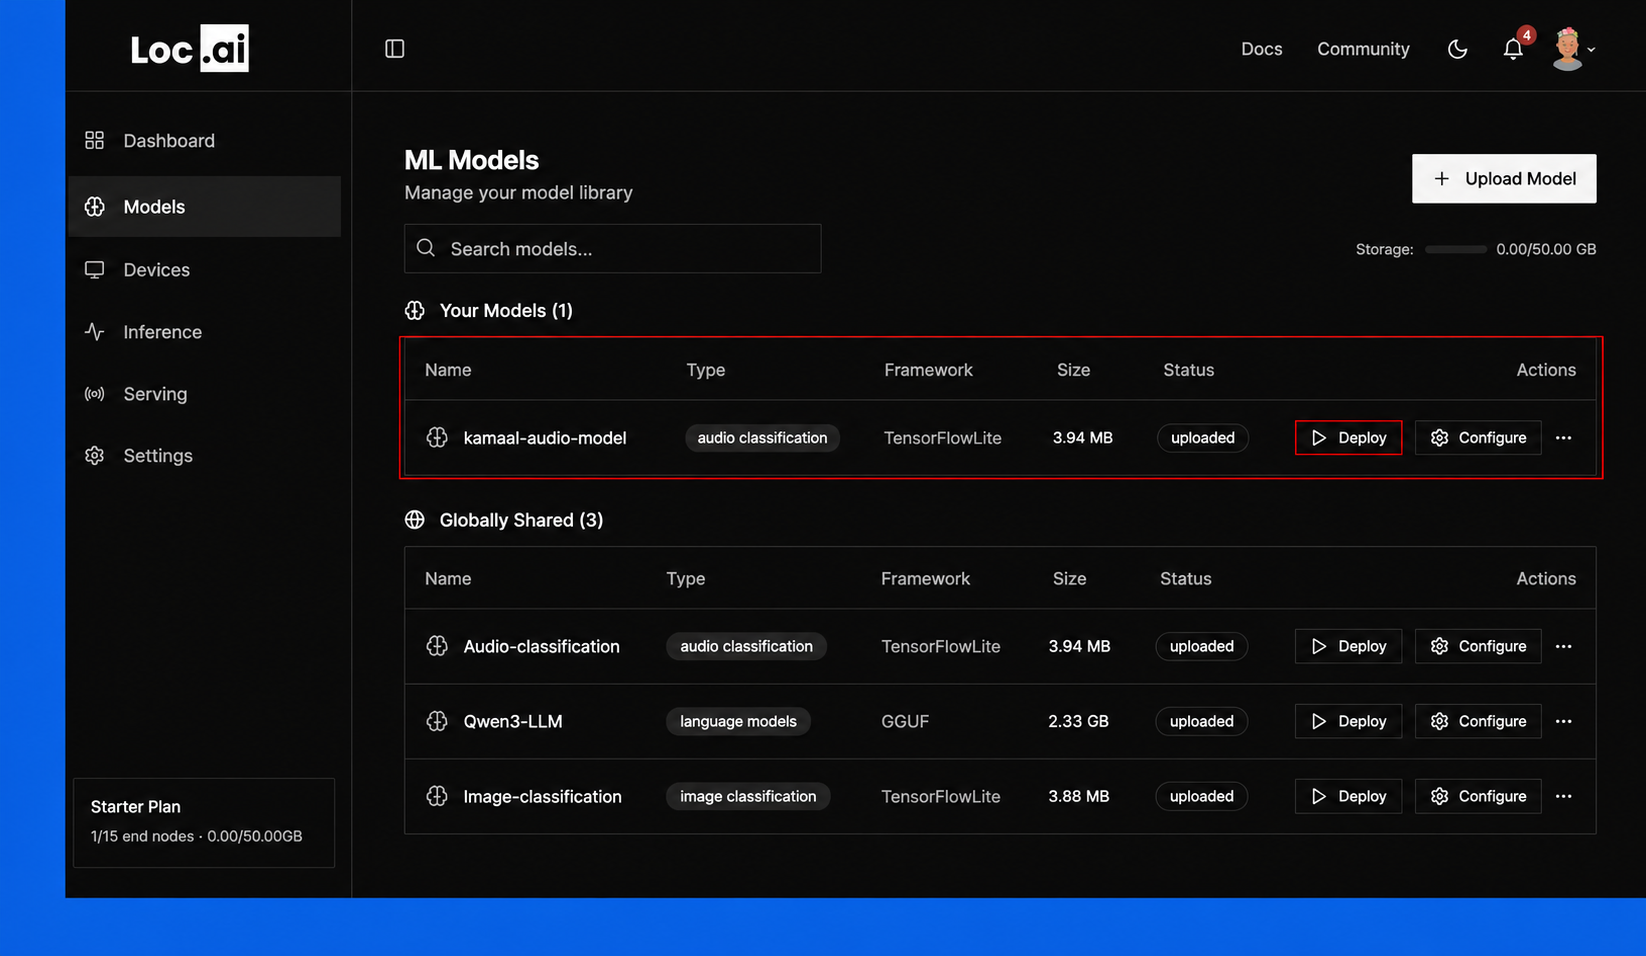
Step 1: From the Dashboard, locate the Models icon in the left sidebar menu. Click it to open the Models section. The Models page shows summary cards for your library (total models, registry storage used, and how many models are deployed), and you can search, filter, and sort your models by type, framework, deployment state, and file size.

Step 2: After registering your device via cmd, next step is to deploy a model. To deploy a globally shared model, go to the sidebar menu, click Models icon, then simply select them from the Globally Shared Models section and click Deploy button.
In this guide I have slected the Image Classification model as an example, but you can choose any model that suits your use case.
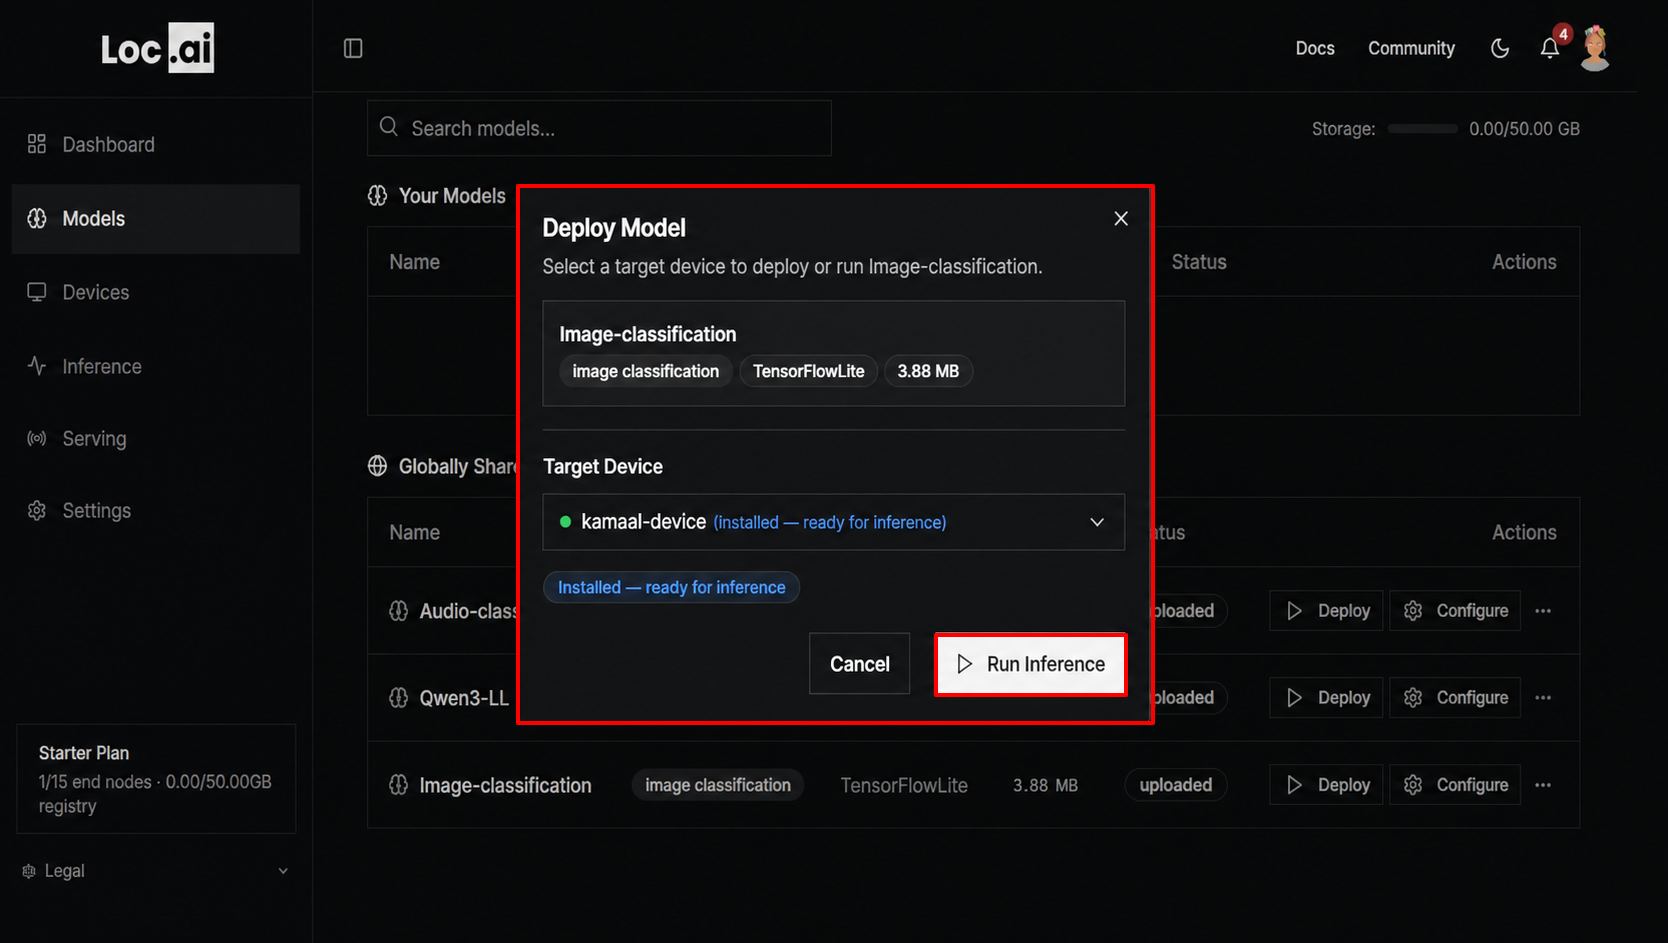
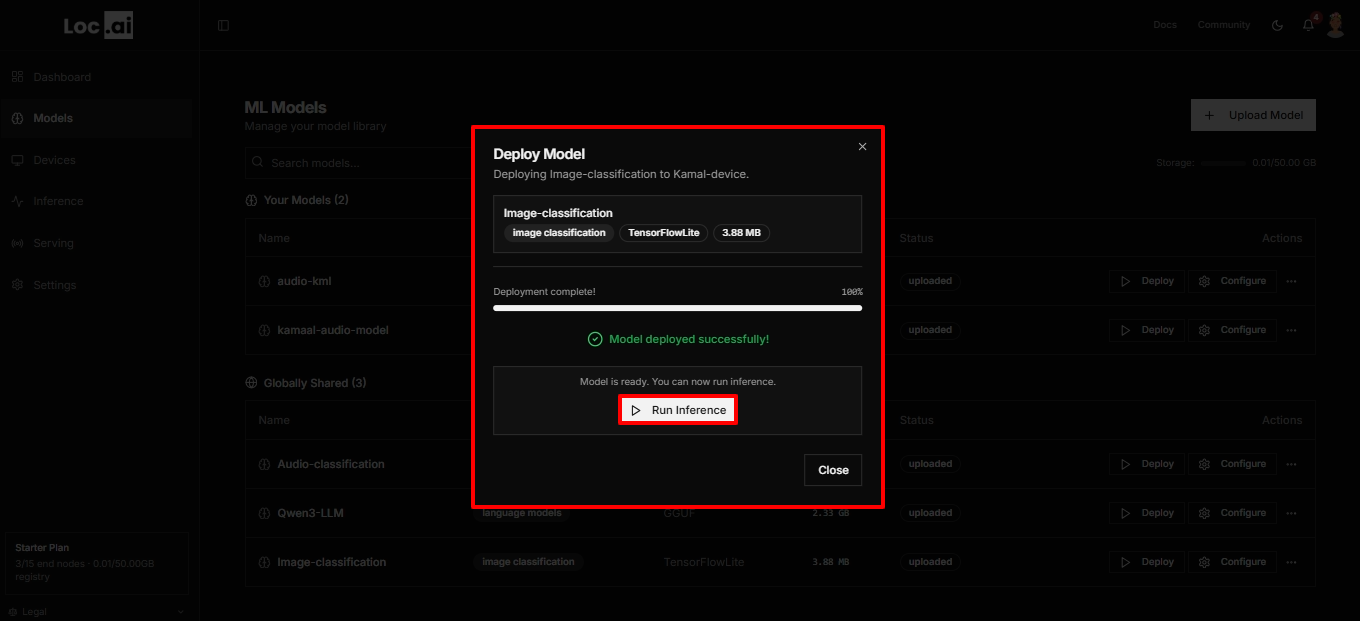
Step 3: In the Deploy Model window, select your target device from the list, then click Deploy Model button to start deploying the selected model.

Step 4: Once the model is installed and ready, click Run Inference button to start using the model on your selected device.
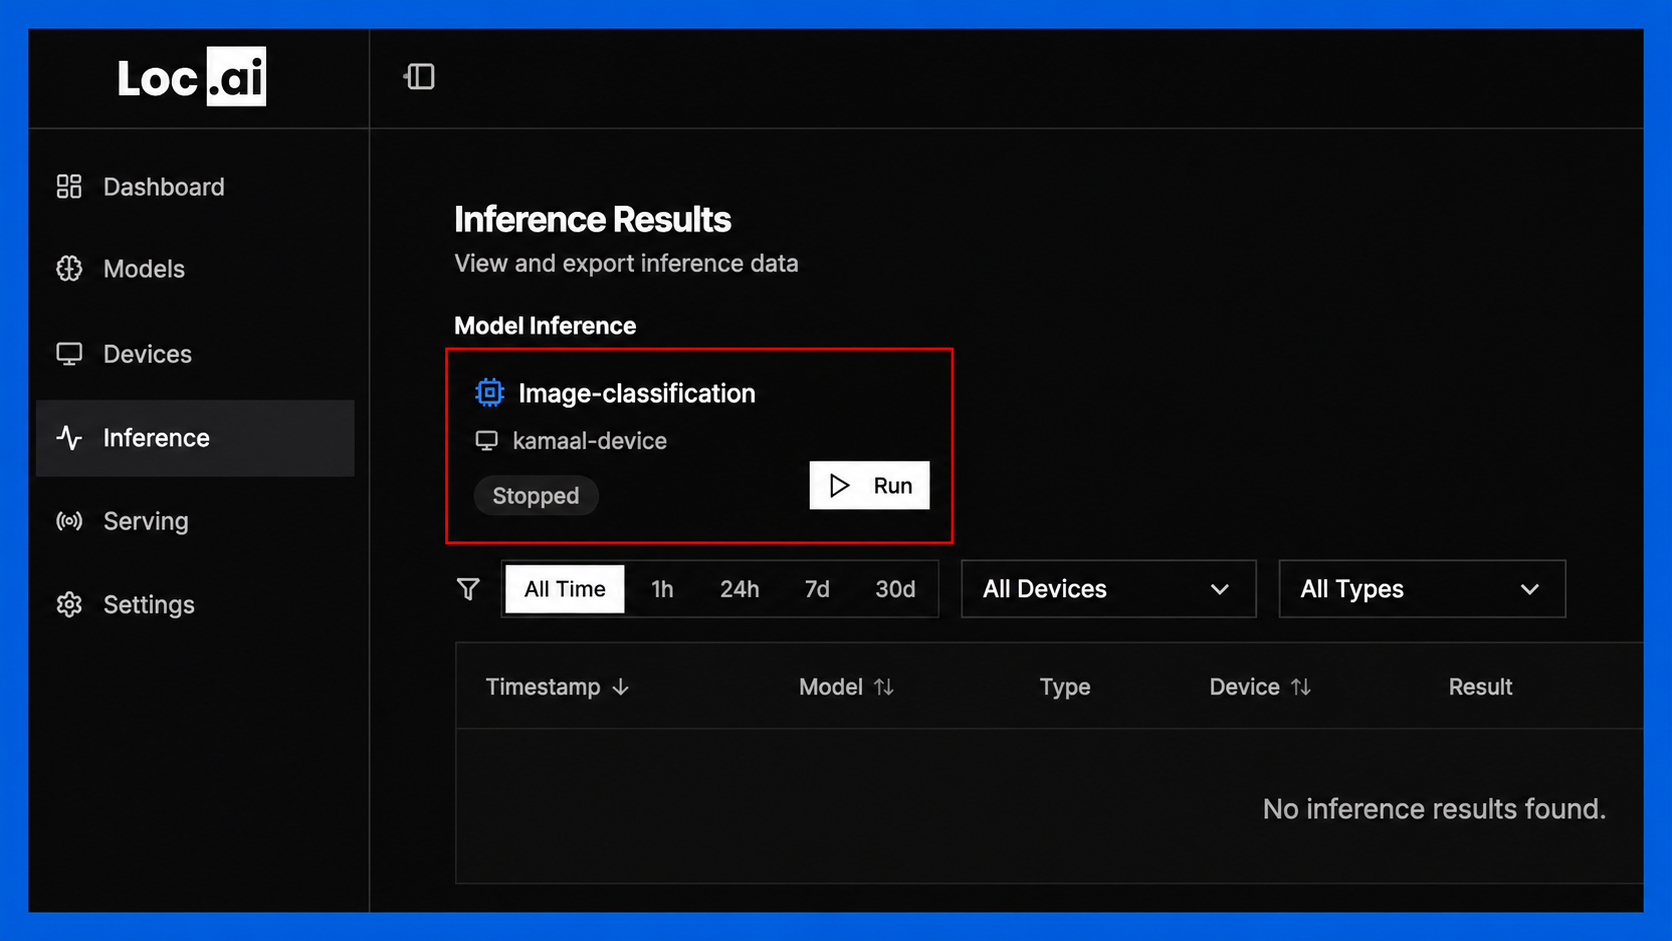
Once you hit on the Run Inference button, the model will be visible in the Inference section of your dashboard, where you can run/stop the model to send input data, view results, and monitor performance in real-time.
B. Deploy Your Custom Models
The custom model deployment option allows you to deploy any model from your model library to your registered devices. This option is useful when you have specific models that you want to run on your edge devices, or if you want to test and iterate on your custom models.
Steps to Deploy a Custom Model
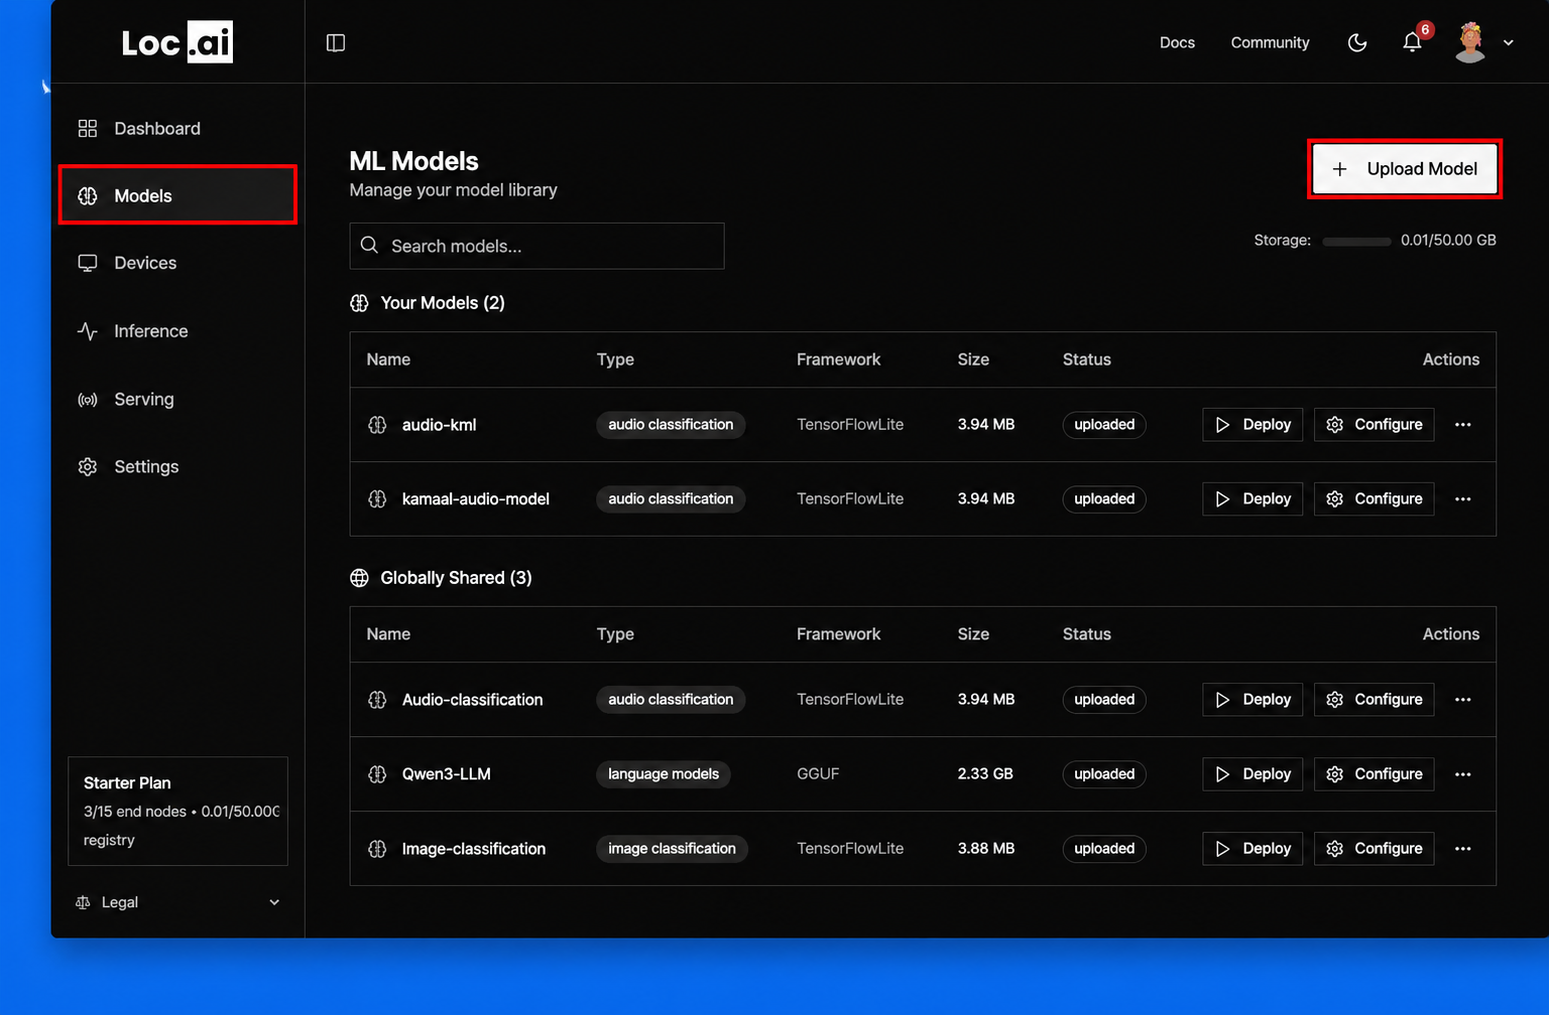
Step 1: After registering your device via cmd, next step is to deploy a model. Go to the sidebar menu, click Models icon, then select Upload Model button to add a new AI model to the platform.
Step 2: A pop up will appear requiring you to enter a model details. Enter the model details as illustrated in the table below, then click Upload button to add the model to your library.
| Field | Description | Option/Example |
|---|---|---|
| Model Name | Enter a unique name for the model that will appear in your model library. | my-audio-model, YOLOv8 Custom |
| Model File | Drag and drop or browse to upload the supported model file from your device. Size upto 500MB | Supported formats include: .onnx, tflite, .pt, .gguf, .h5. |
| Model Type | Select the category of the model. | Options include: Image Classification, Audio Classification, Language Models, Others |
| Framework | Choose the framework used to build the model. | PyTorch, TensorFlow, TensorFlow Lite, ONNX, GGUF, Scikit-learn, Other. |
| Version | Specify the model version to help track updates and releases. | 1.0.0 |
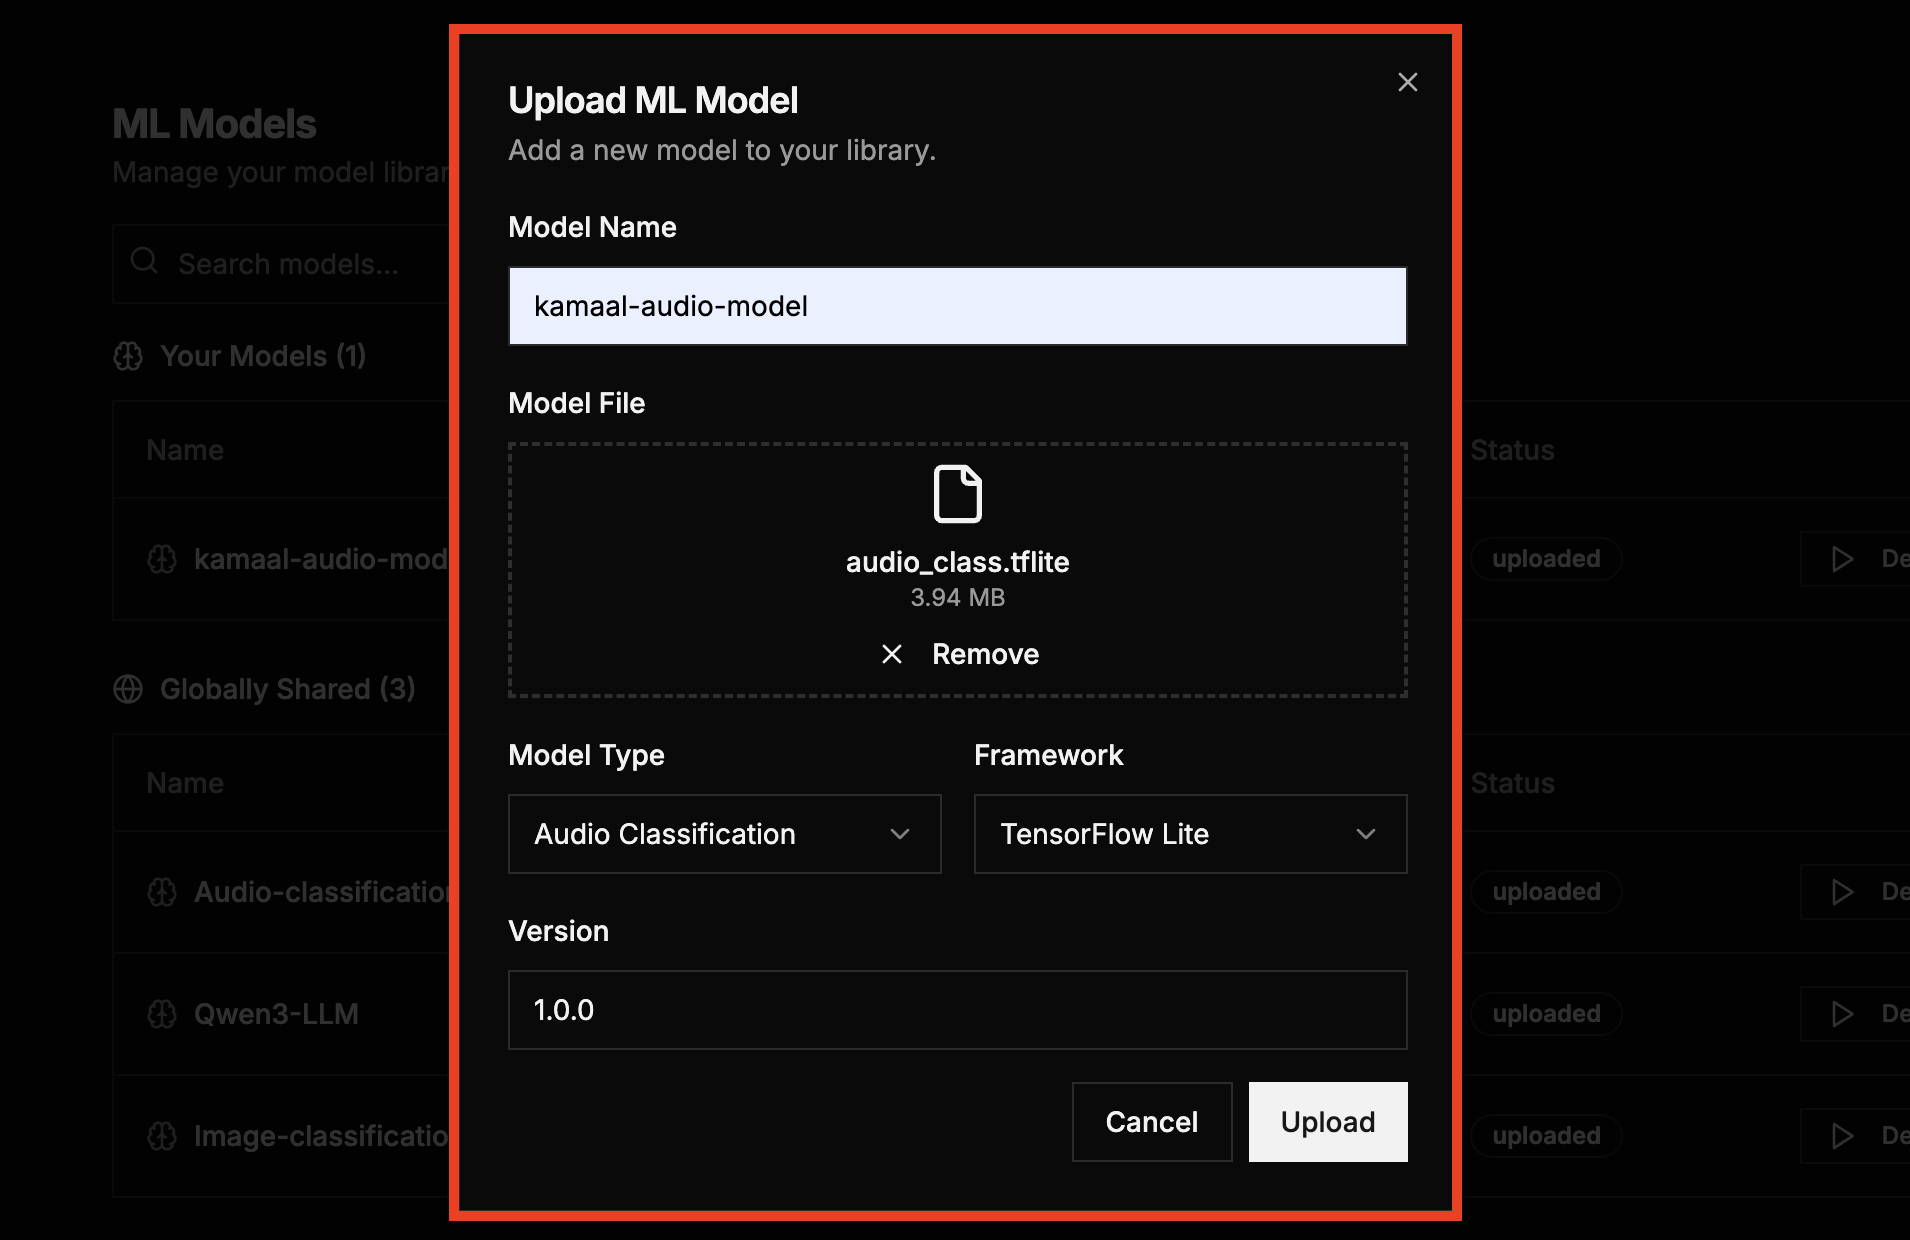
Step 3: After entering the model details, click the Upload button to add the model to your library.
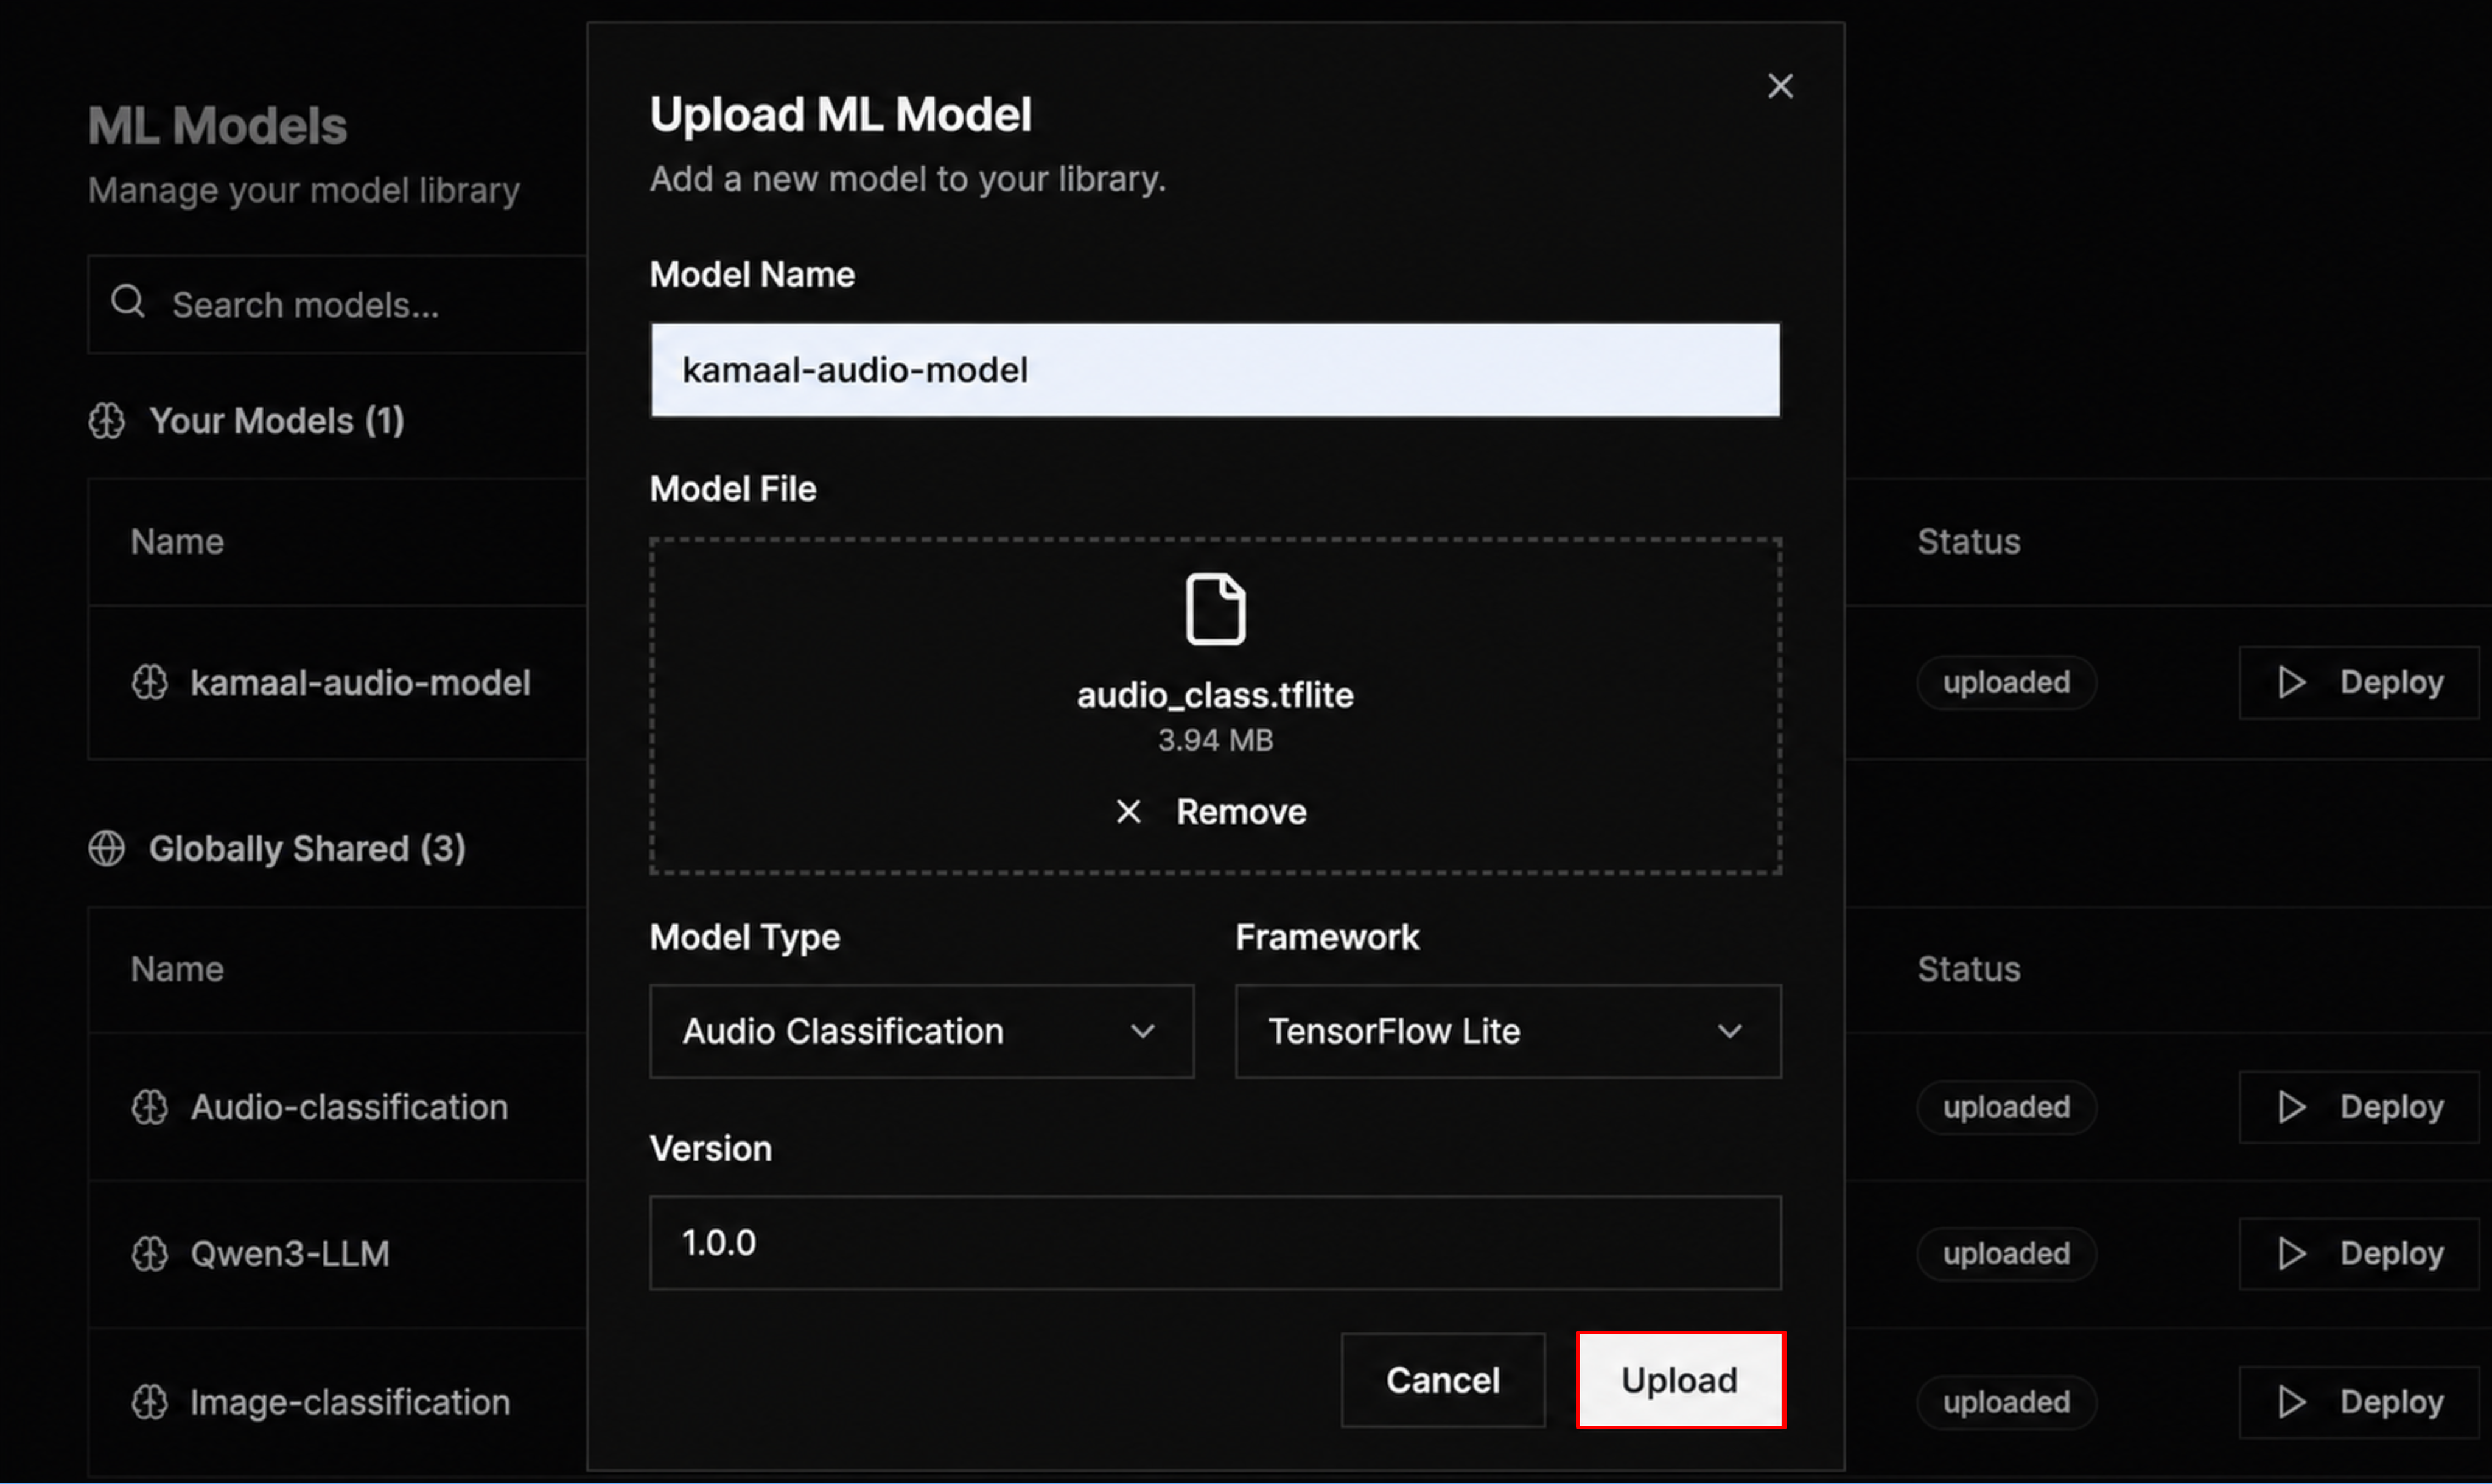
Step 4: Once the model is uploaded, it will appear in the My Models section of your library. To deploy it, simply click the Deploy button next to the model.
Step 5: In the Deploy Model window, select your target device from the list, then click Deploy Model button to start deploying the selected model.
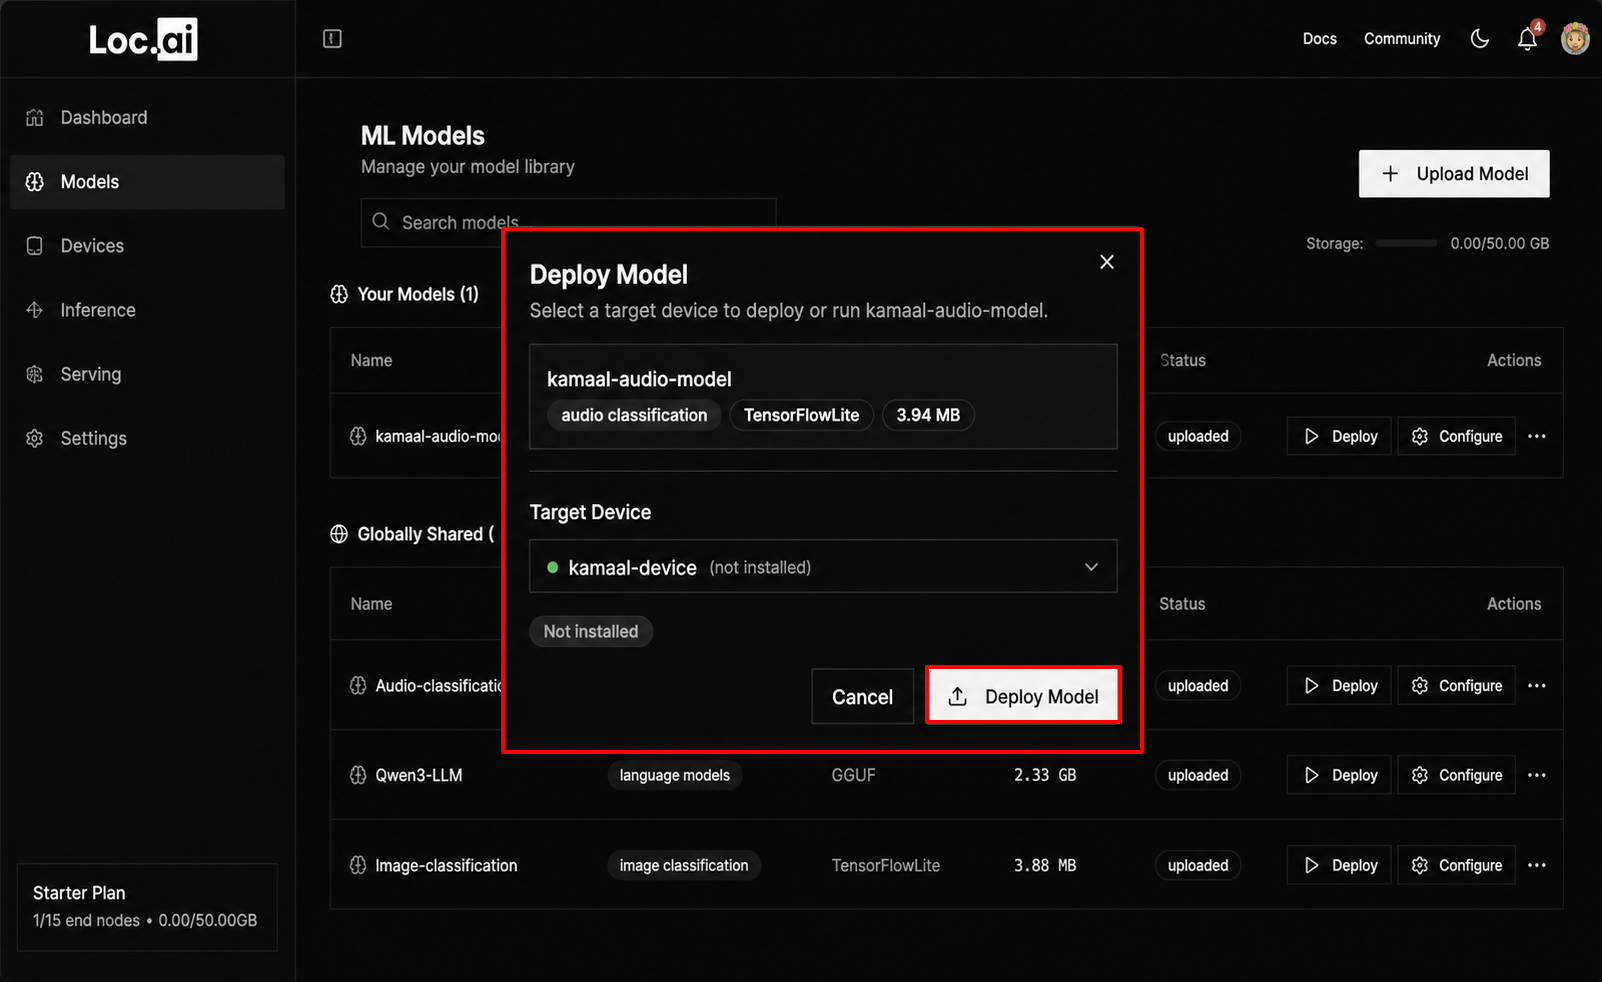
Step 6: After the model is deployed successfully, click the Run Inference button to open the inference interface and start testing your model.
Cancel a Deployment
While a model is still downloading to your device, you can stop the deployment instead of waiting for it to finish. A Cancel deployment button appears in the Deploy Model dialog while the deployment is in progress, and every active row in the Deployments tab also has a Cancel option.
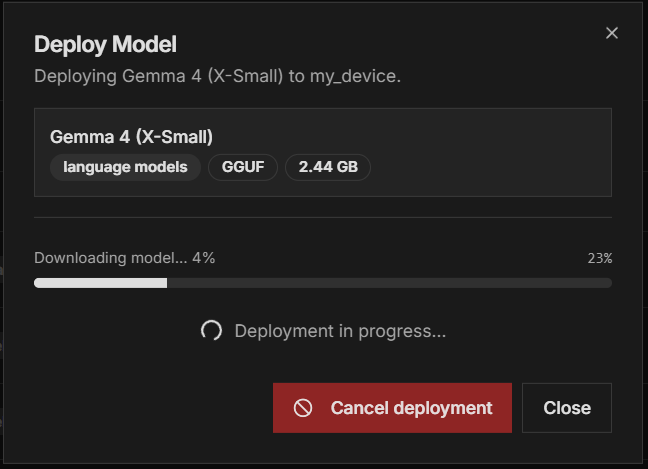
The cancel request is sent to your device, which stops the download. If the device has already finished downloading the model, there is nothing left to stop and the deployment completes as normal.
If you try to deploy a model that is already being deployed to the same device, the platform asks you to cancel the in-progress deployment first.
Track Your Deployments
The Deployments tab in the notifications bell (top bar) shows all your model deployments in one place, across every device:
- The bell shows a badge when deployments (or uploads) are active.
- Each row shows its live status: queued, downloading with progress, deployed, cancelled, or failed.
- Active rows can be cancelled directly from the panel.
- Finished rows can be dismissed, and clear on their own about a minute after settling.
Now you can Run first interface.