Open WebUI
Pair Loc.ai with Open WebUI to create a private browser-based AI workspace. Run chat models you serve locally on your own hardware.No subscriptions, no cloud inference, and no vendor lock-in.Your data stays inside your network with full control.
What is Open WebUI?
Open WebUI is a self-hosted, ChatGPT-style interface for language models. It runs in your browser and connects to any OpenAI-compatible API which means it works with models served via Loc.ai out of the box.
How it works
Two components, one local network:
- Loc.ai: Deploys and serves your chosen model on your hardware (PC or VM), exposing an OpenAI-compatible endpoint on a port you choose.
- Open WebUI: Runs in the browser on your main computer. It talks to Loc.ai's endpoint over your local network.
All inference stays on your hardware. Nothing is sent to external servers.
Steps to Integrate with Open WebUI
Step 1: Refer to the Register a Device page to register your device with Loc.ai before continuing with the openwebui setup.
Once registered, the device status changes to Online in the dashboard.
Step 2: Once your device is registered, go to ML Models in the Loc.ai dashboard, upload a GGUF model or choose one from the model library, set the type to Language Model, then deploy the model to your registered device.
Step 3: Refer to the serving a Model page, then open the deployed model in the dashboard, click Start Serving, and choose a port (for example: 8123).
Save the device IP and port you'll need them in step 7.
Step 4: Install and start Open WebUI on your main computer by running the following command in Command Prompt (CMD):
pip install open-webui
open-webui serve
you can Download and install Open WebUI Desktop on your main computer from the Open WebUI Desktop Download Page, then launch the application on your PC.
Open http://localhost:8080 in your browser.
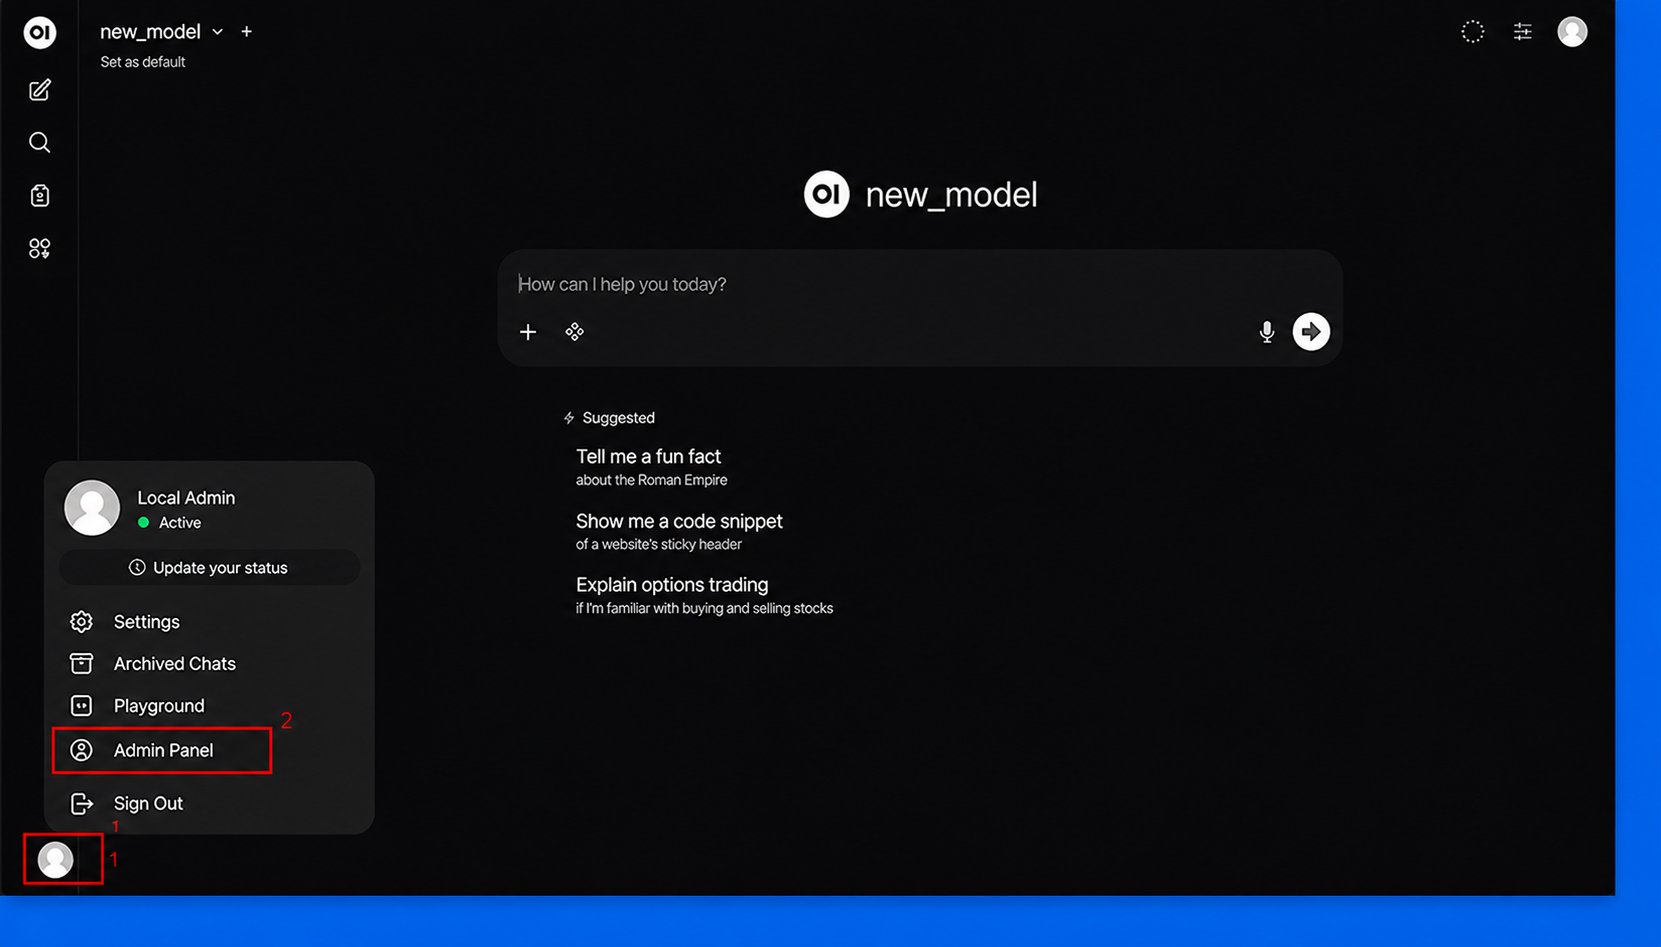
Step 5: Connect Open WebUI to Loc.ai Open the profile menu in the bottom-left corner of Open WebUI, then click Admin Panel to access the administrator settings and continue the configuration.
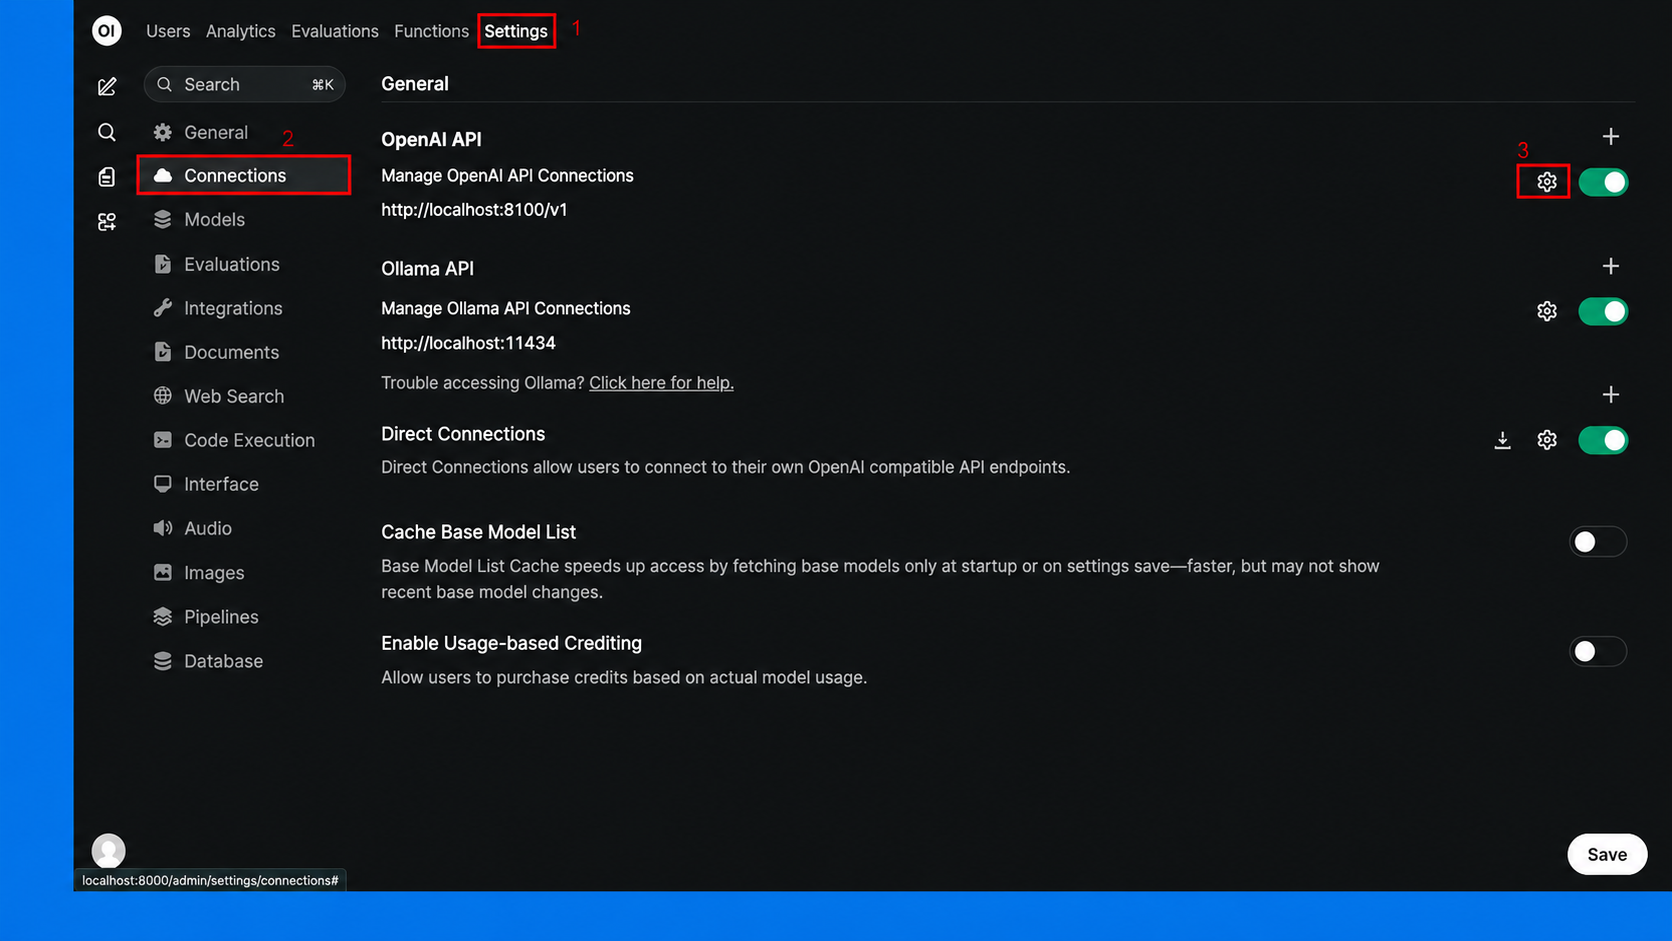
Step 6: In the Admin Panel, open Settings, select Connections, then enable the required connection options and save the changes to link Open WebUI with Loc.ai.
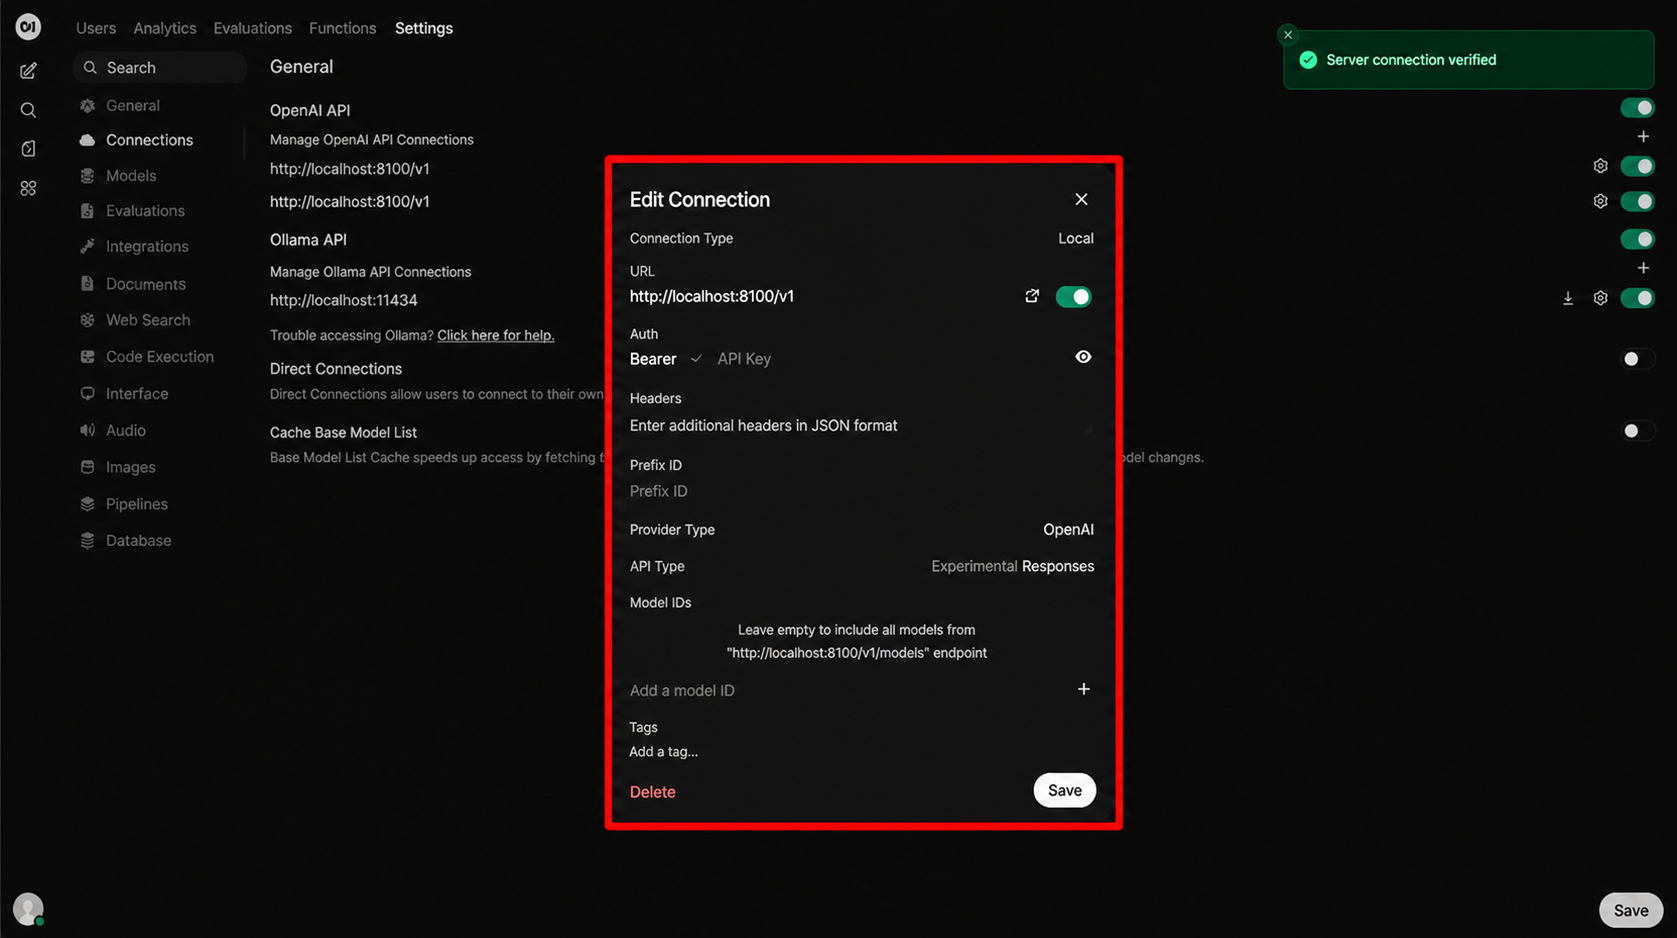
Step 7: Open the connection settings, verify the Loc.ai server URL and connection details, then click Save to confirm and complete the integration.
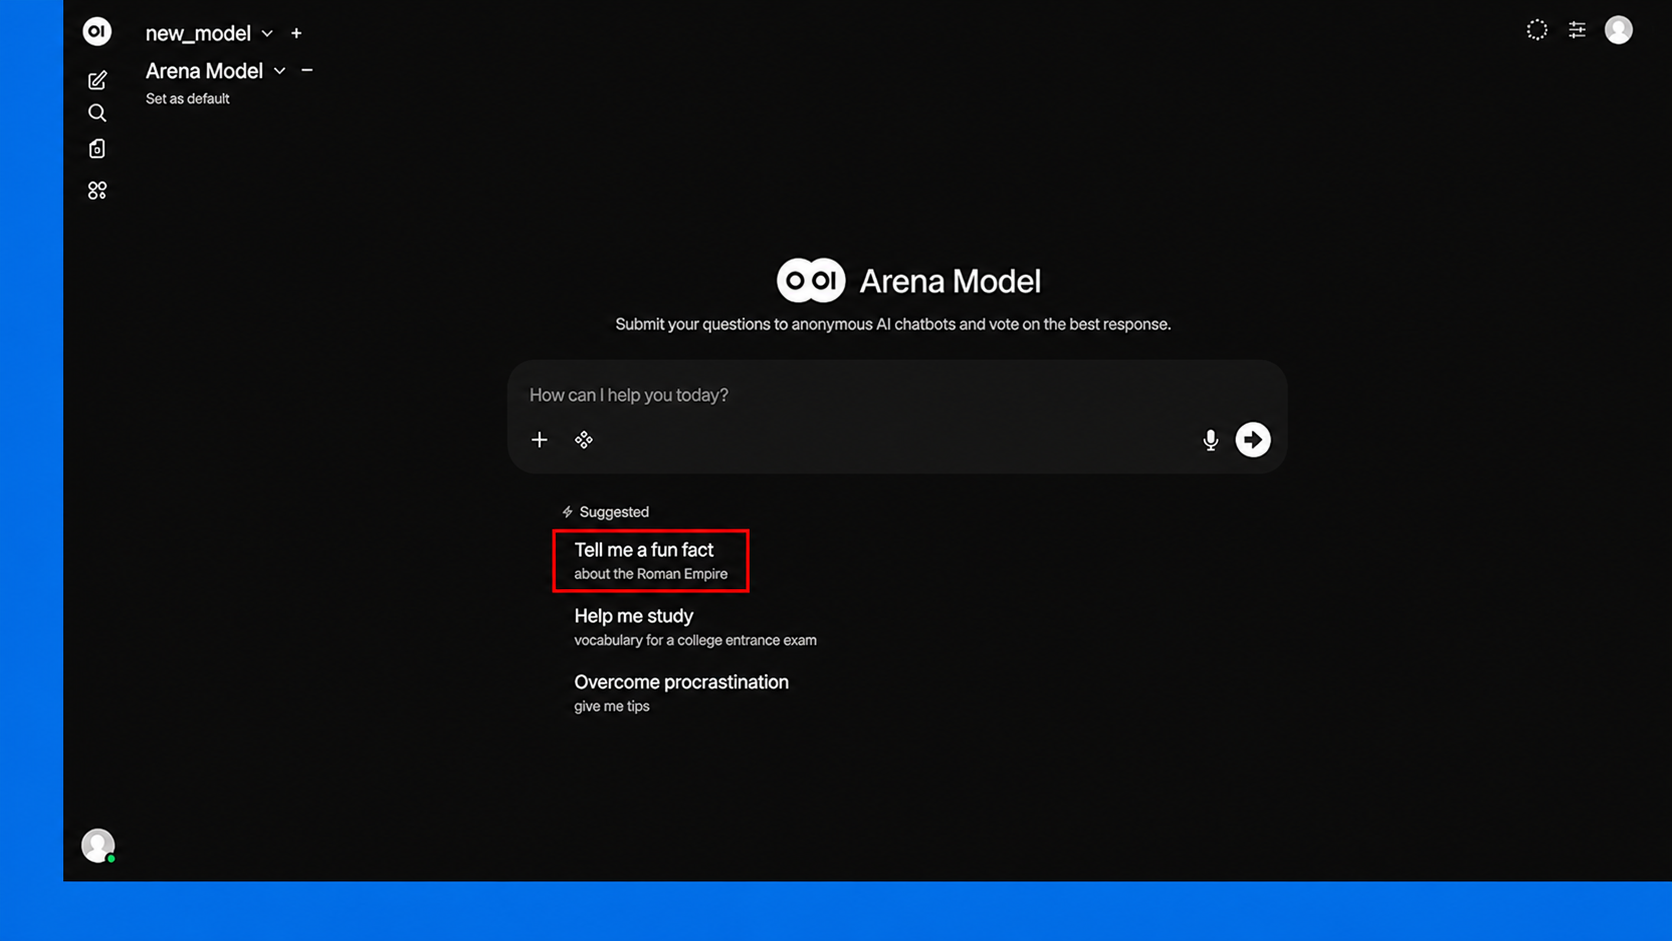
Step 8: Click the current model name at the top-left corner (1), then choose your preferred Loc.ai model from the dropdown list (2) to start using it in Open WebUI.

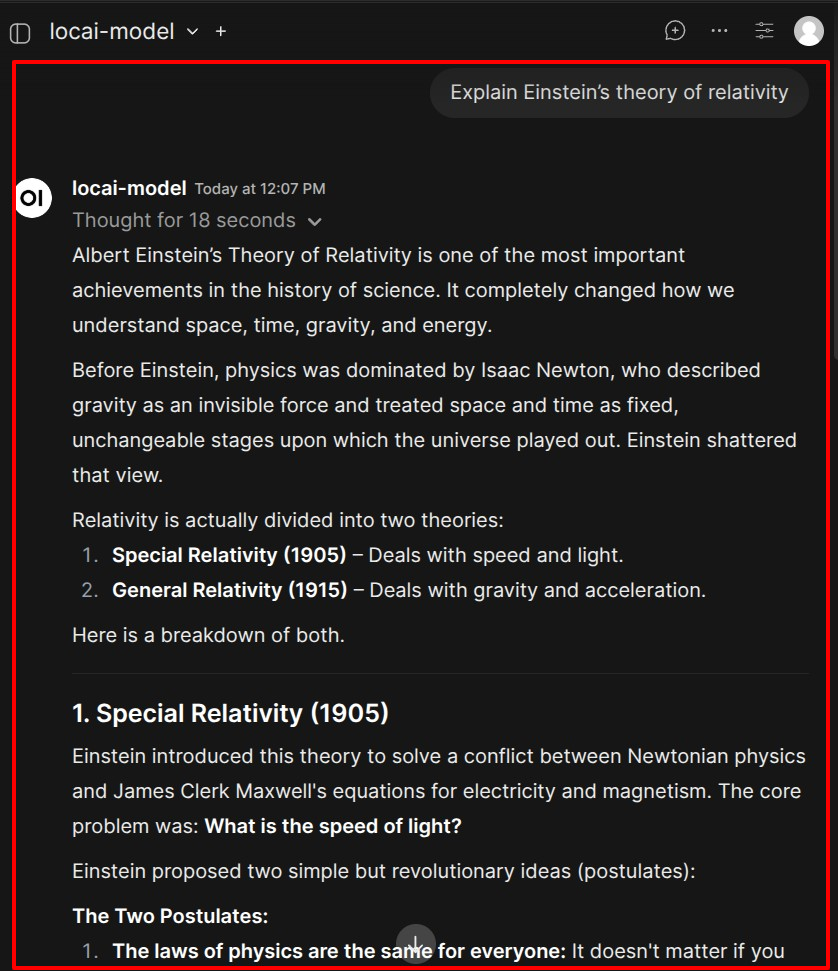
Step 9: After selecting the model, type your question in the chat box or choose a suggested prompt to start interacting with Loc.ai through Open WebUI.
Step 10: Select your Loc.ai model from the model dropdown at the top of the chat, and your private AI assistant is ready to use.
Serve different models on separate ports and add a connection for each one in Open WebUI. You can switch between them from the same dropdown without any extra configuration.