Obsidian
Combine your notes with local, private AI by integrating Loc.ai with Obsidian. Connect Loc.ai to Obsidian and bring private AI directly into your notes. Use chat and inline writing assistance inside your workspace. Get context-aware suggestions powered by your own hardware. Nothing leaves your network, keeping your data private.
What is Obsidian?
Obsidian is a writing and knowledge app built on local Markdown files, with bidirectional linking and one of the richest community plugin ecosystems around. People use it as a research tool, a journal, a project planner a "second brain."
Adding a locally served model through Loc.ai turns it into something more: an AI that works within your knowledge base, not alongside it.
Why Loc.ai + Obsidian?
Privacy: Your notes and every prompt you send stay on your devices. Local serving means no data passes through external servers, ever.
Offline-capable: Once your model is deployed, it keeps working without an internet connection. No API keys to expire, no service outages to wait out.
Prerequisites
Before you begin, make sure you have:
- Loc.ai Link installed and your device registered registration guide
- Loc.ai Link running on the device
- Obsidian installed with a vault open
Steps to Integrate with Obsidian
Step 1: Once your device is registered, go to ML Models in the Loc.ai dashboard, upload a GGUF model or choose one from the model library, set the type to Language Model, then deploy the model to your registered device.
Upload time depends on the model size and your internet connection speed. Quantized models (such as Q4) upload much faster and still deliver strong performance for most writing tasks.
Step 2: In the Locai dashboard, click Serving Model from the left sidebar, then copy the Local Endpoint URL for your deployed model. This endpoint will be used later when configuring Obsidian Smart Composer.
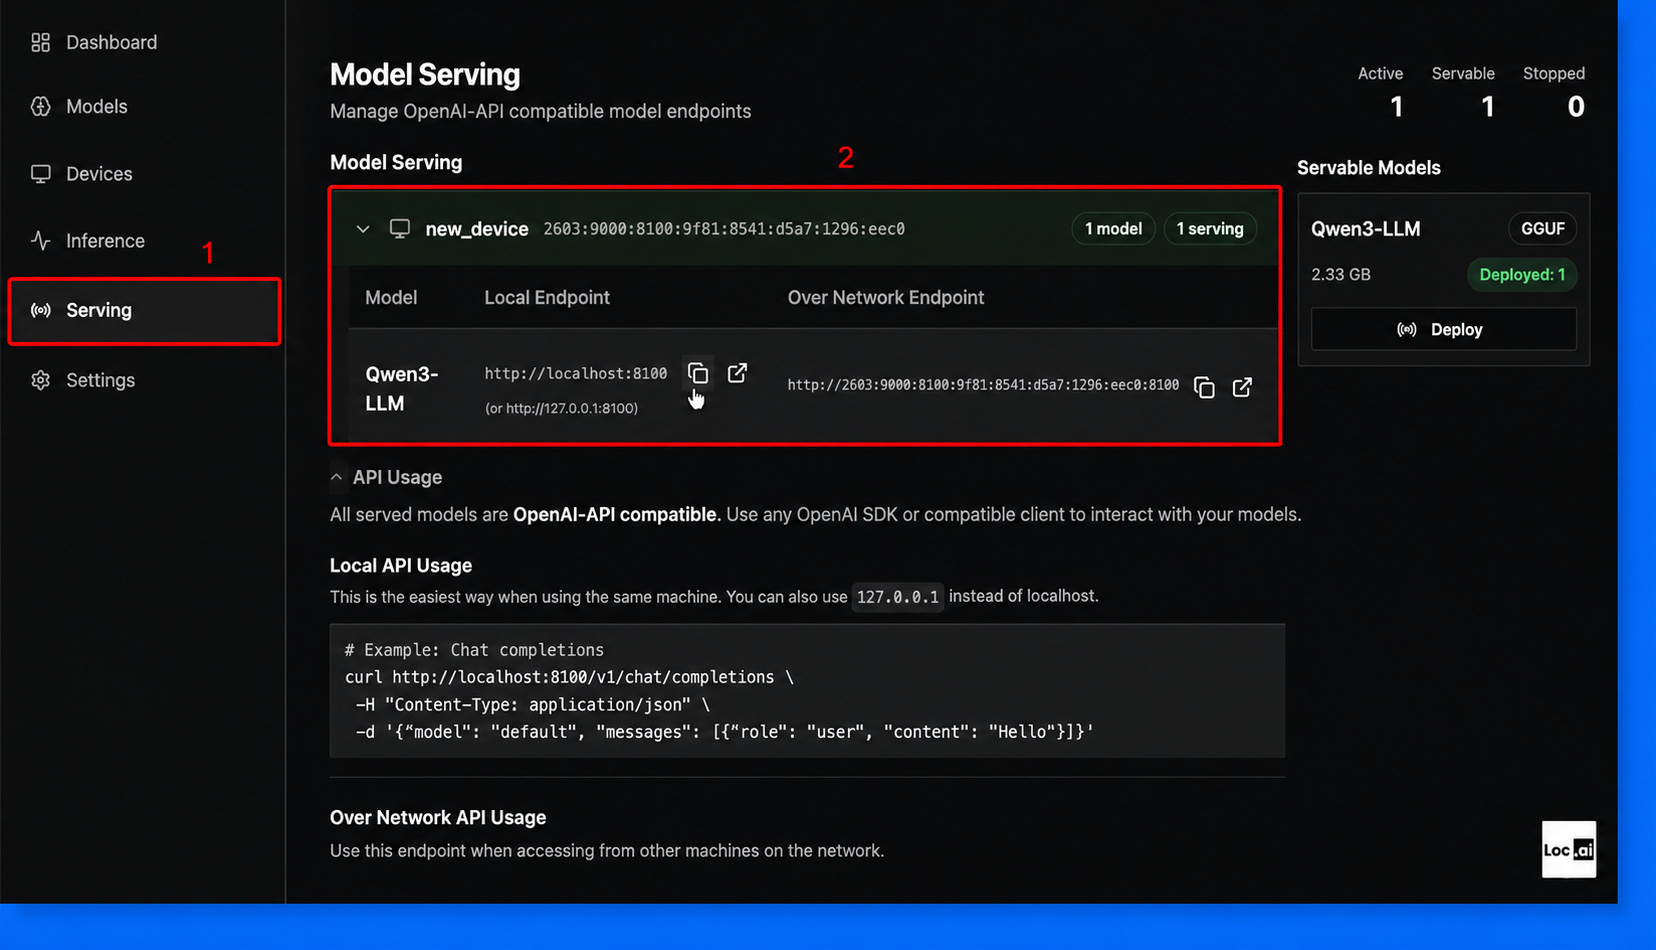
Your endpoint base URL will look like http://127.0.0.1:8100/v1. Save this URL for the plugin configuration in the next step, where it will be used to connect Obsidian to the chat plugin.
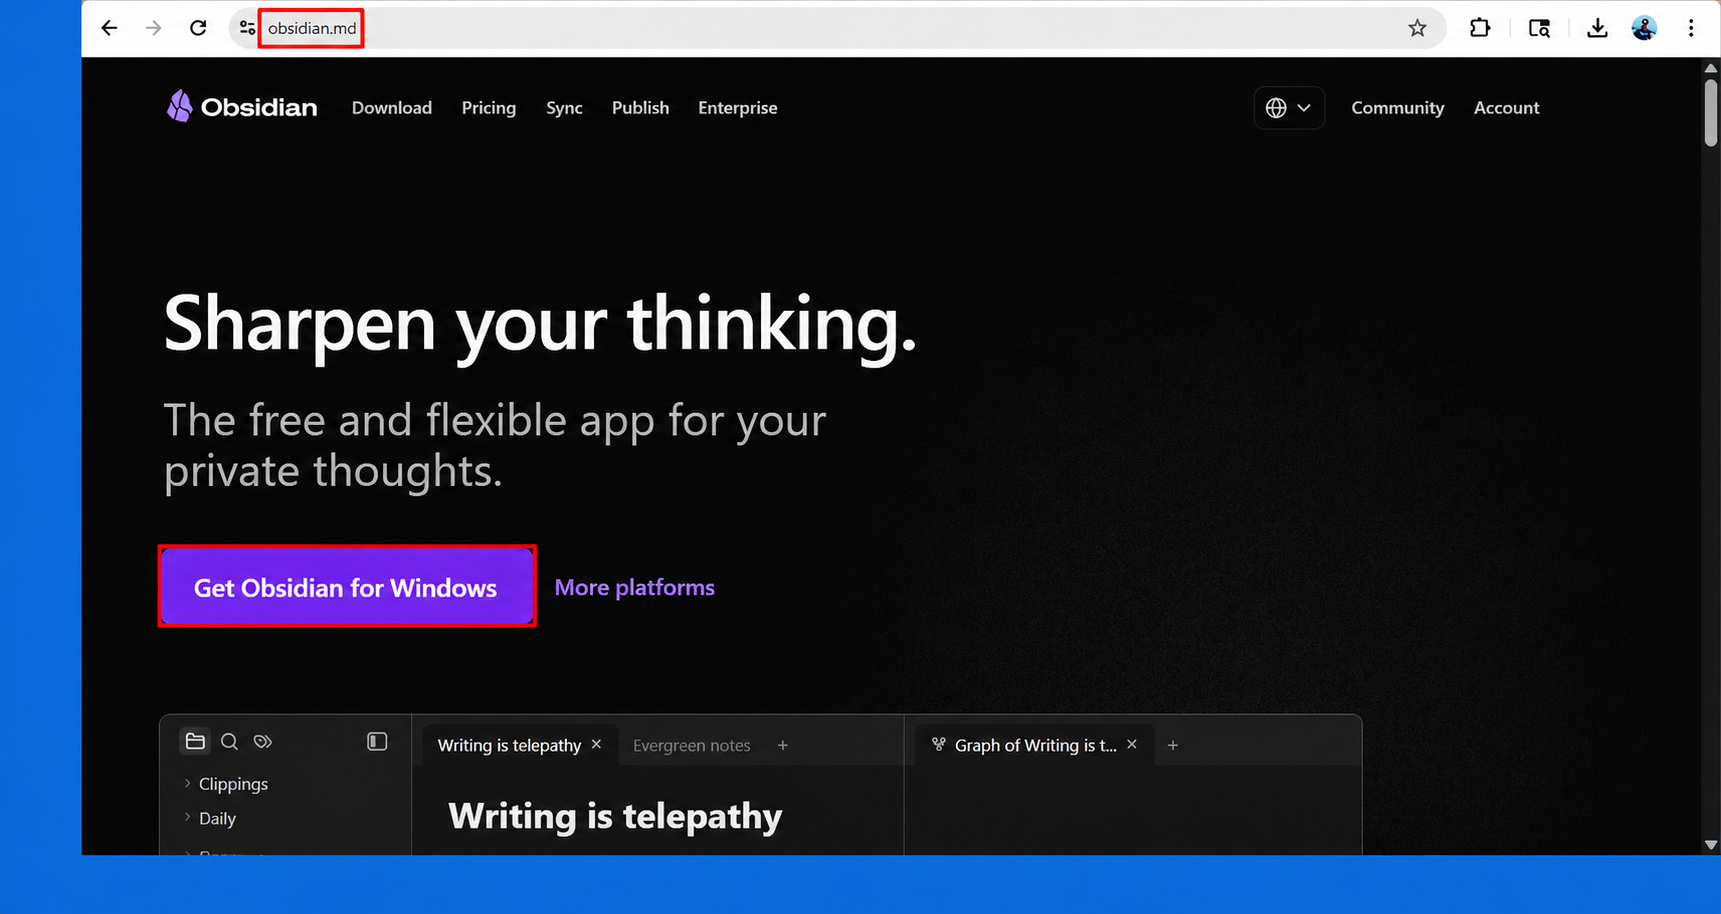
Step 3: On the Obsidian homepage, click Download from the top navigation bar or click the purple Get Obsidian for Windows button to open the downloads page.
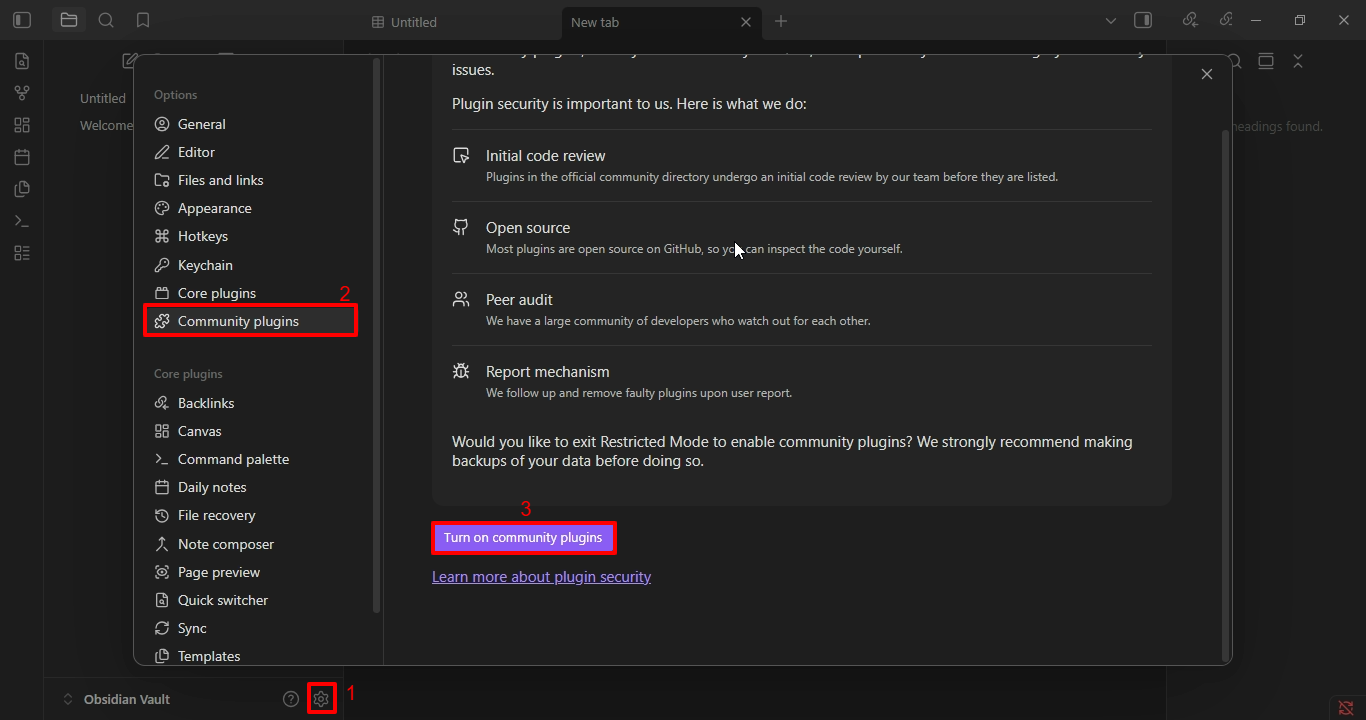
Step 4: Open Obsidian, click the Settings icon in the bottom-left corner, select Community Plugins, then click Turn on community plugins.
Step 5: In the Community Plugins section, click the Browse button to open the plugin marketplace and search for the required plugin.

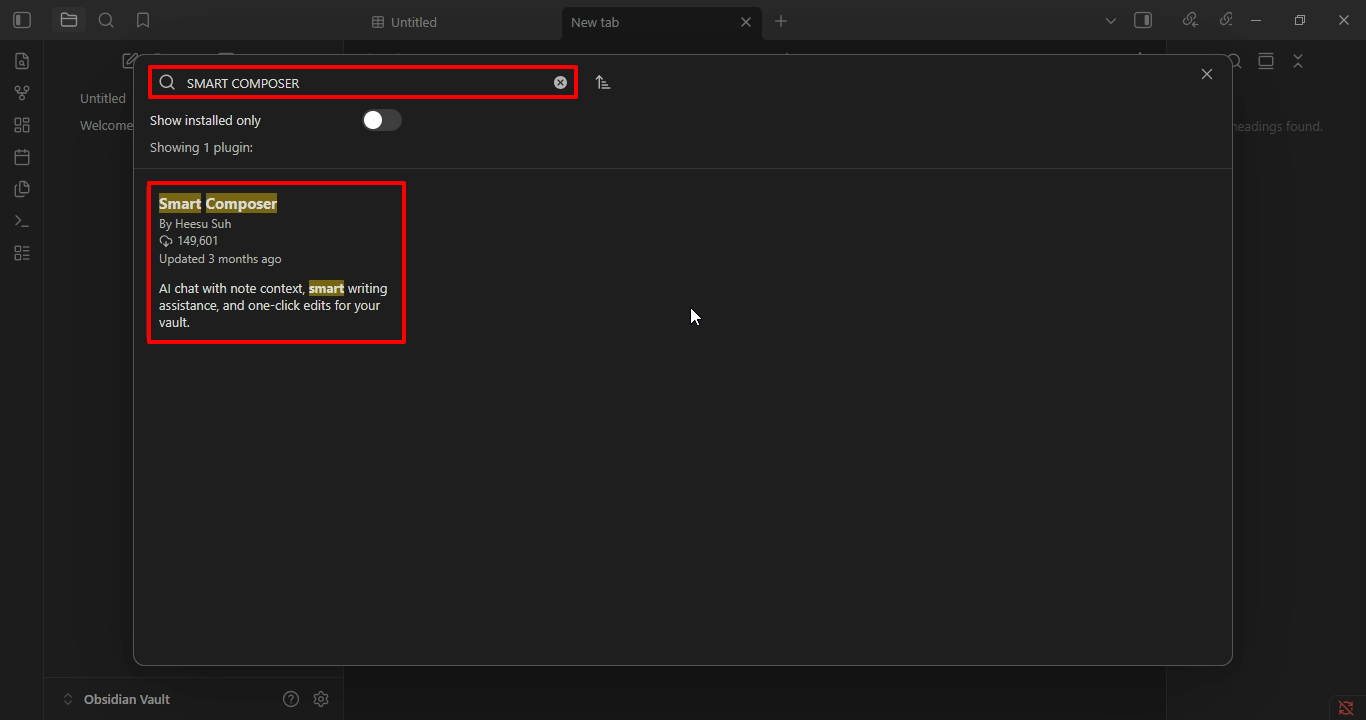
Step 6: In the plugin marketplace, type Smart Composer in the search bar, then select the Smart Composer plugin from the search results.
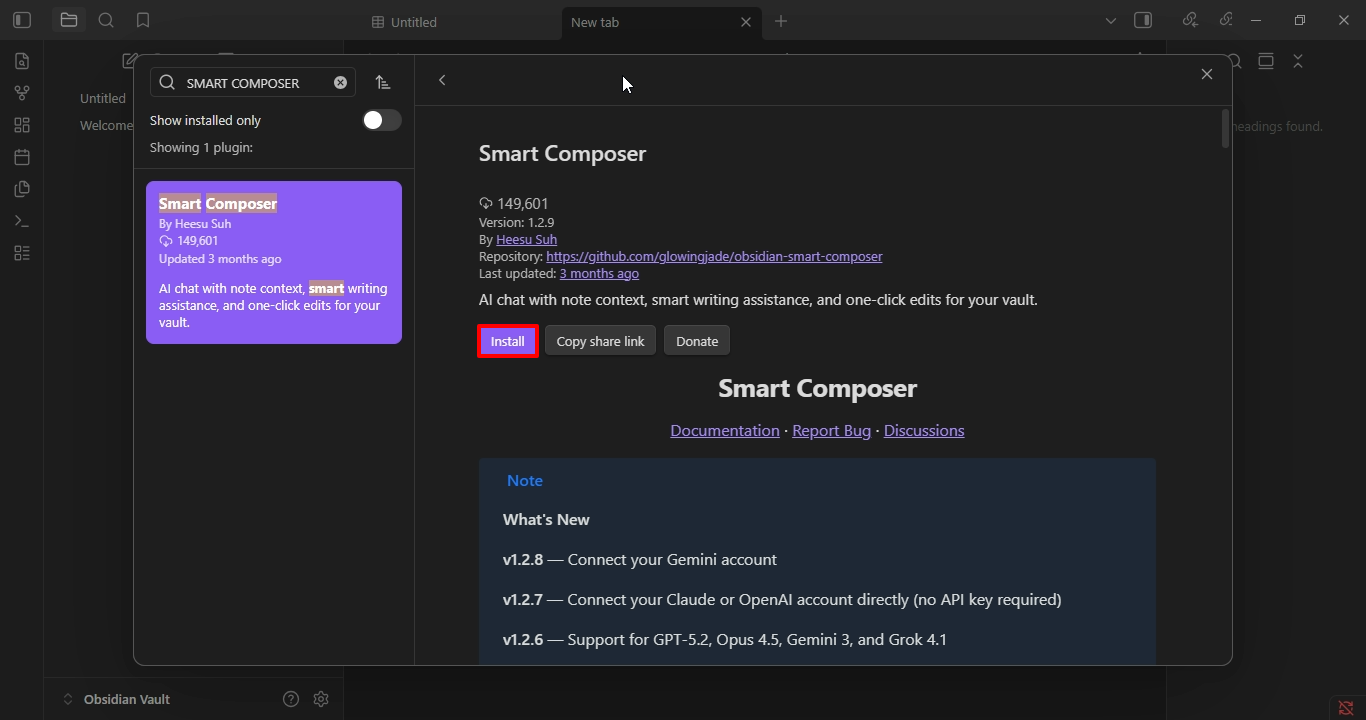
Step 7: Open the Smart Composer plugin page, then click the Install button to begin installing the plugin.
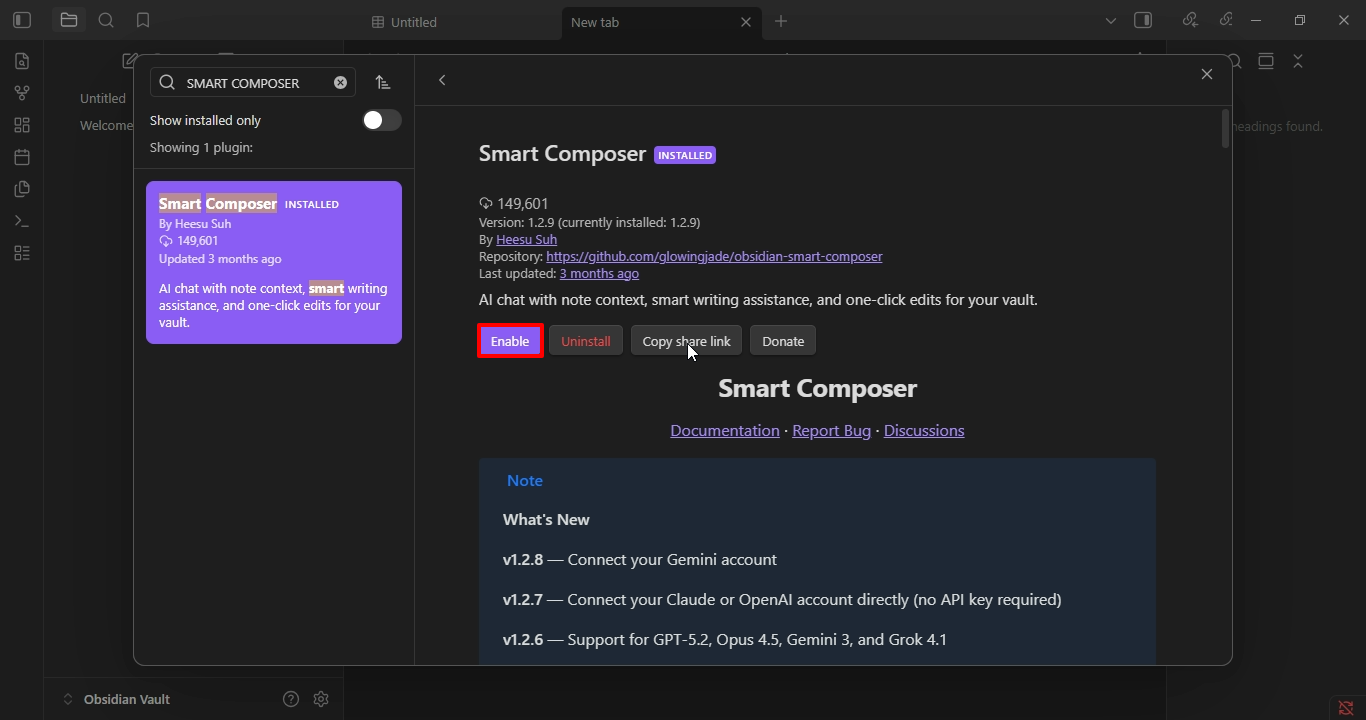
Step 8: After the installation is complete, click the Enable button to activate the Smart Composer plugin in Obsidian.
Step 9: In the left sidebar under Community Plugins, select Smart Composer to open its settings page, then click Add custom provider to configure a new AI provider.

Step 10: In the Add Custom Provider window, enter the provider details such as ID, Provider Type, and Base URL, then click the Add button to save the custom provider.
| Field | Description | Example |
|---|---|---|
| ID | A unique name used to identify the custom provider in Smart Composer settings. | Locai-Connect |
| Provider Type | Select the API format or compatibility type for the provider. | OpenAI Compatible |
| API Key | Enter the API key if your provider requires authentication. Leave blank if not needed. | sk-123abc456xyz |
| Base URL | The endpoint URL where the provider API is hosted. | http://127.0.0.1:8100 |
| No Stainless Headers | Enable this option only if you experience CORS or header-related connection issues. | Disabled |
Enter the Base URL, you have copied from step 2 above (Serving a Model)
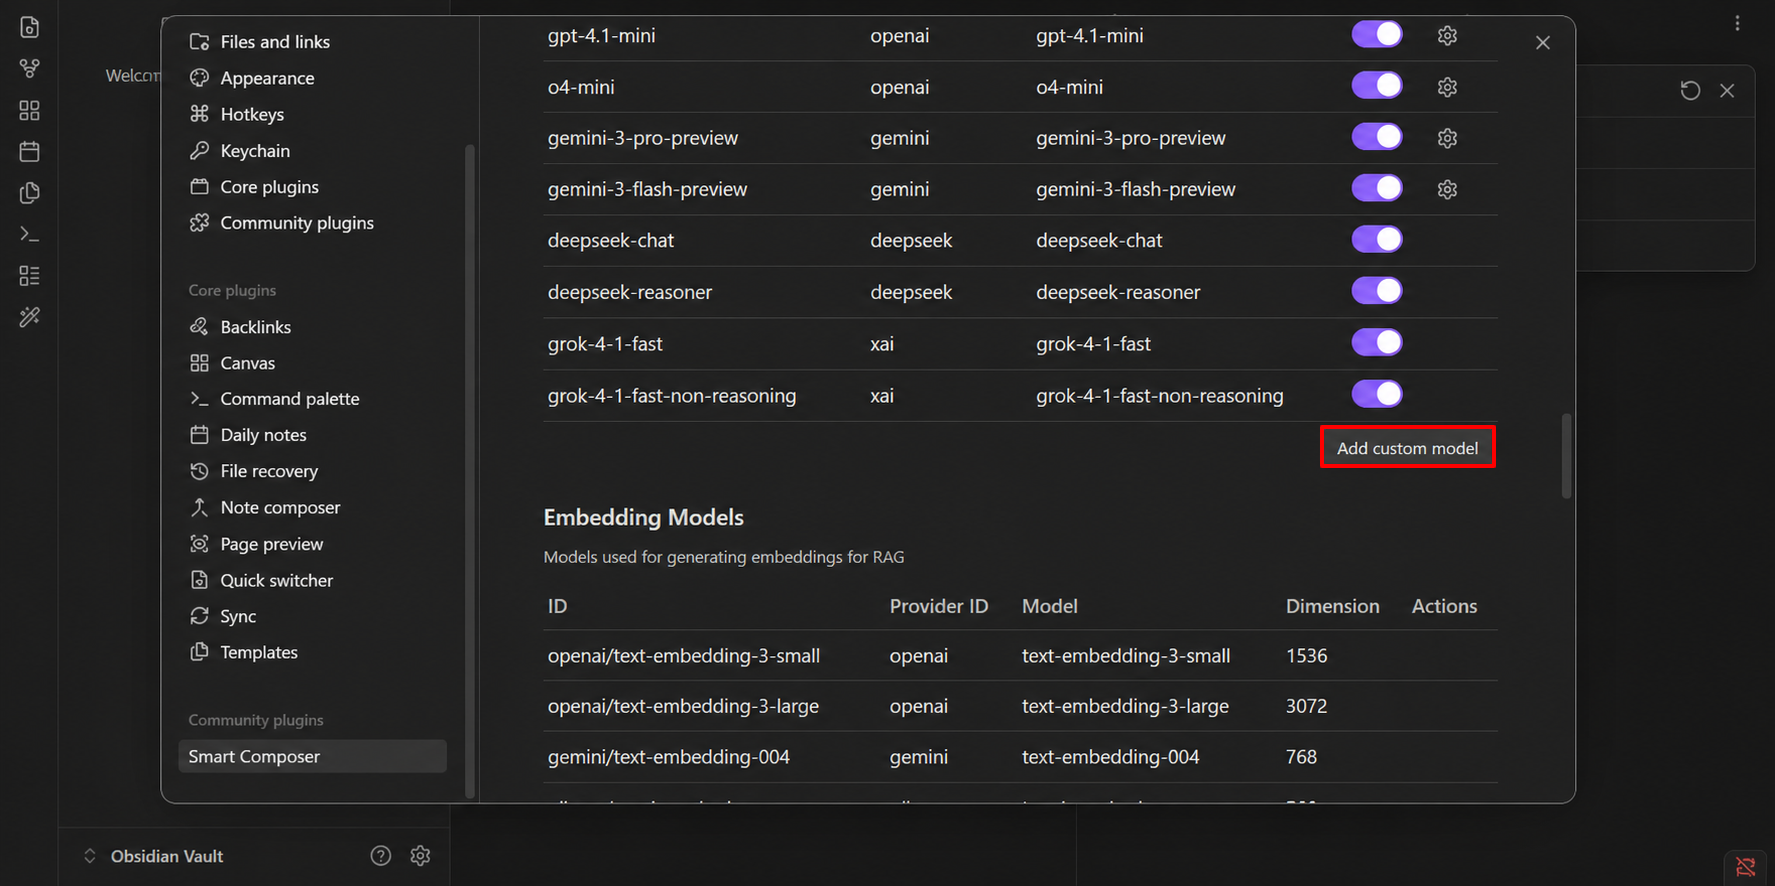
Step 11: Scroll to the Chat Models section, then click the Add custom model button to create and configure a new custom chat model for your provider.
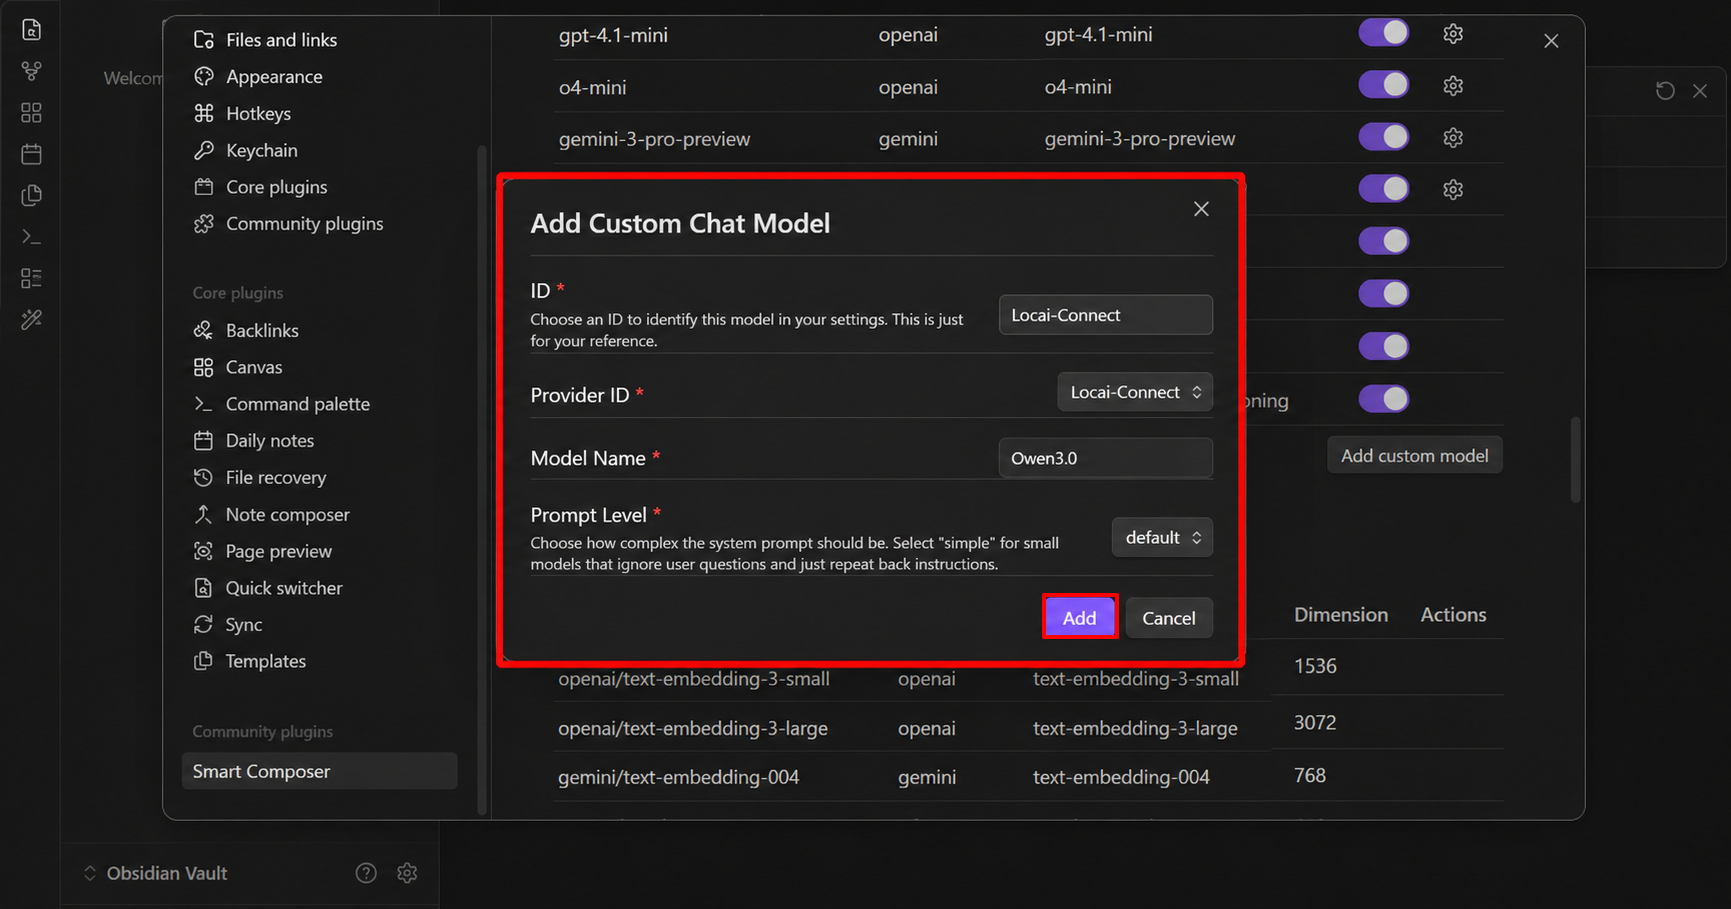
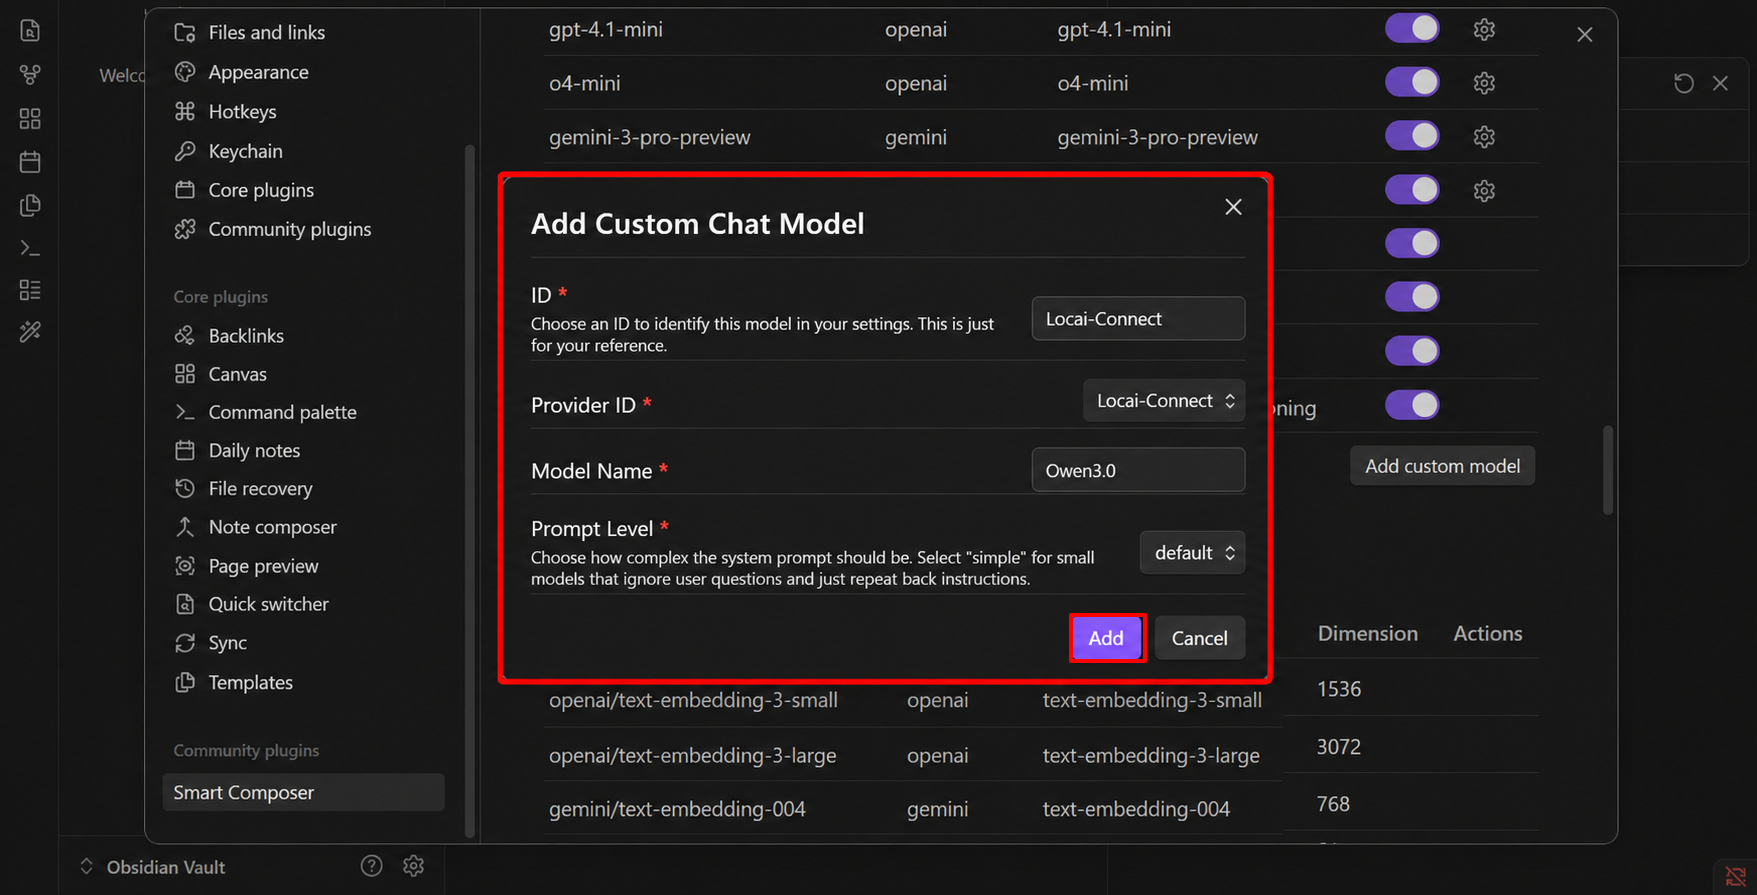
Step 12: In the Add Custom Chat Model window, enter the model details such as ID, Provider ID, Model Name, and Prompt Level, then click the Add button to save the custom chat model.
| Field | Description | Example |
|---|---|---|
| ID | A unique name used to identify the custom chat model in Smart Composer settings. | Locai-Connect |
| Provider ID | Select the custom provider that this model will use. | Locai-Connect |
| Model Name | Enter the exact model name exposed by your API or local server. | qwen3:0 |
| Prompt Level | Choose how detailed or complex the system prompt should be. | default |
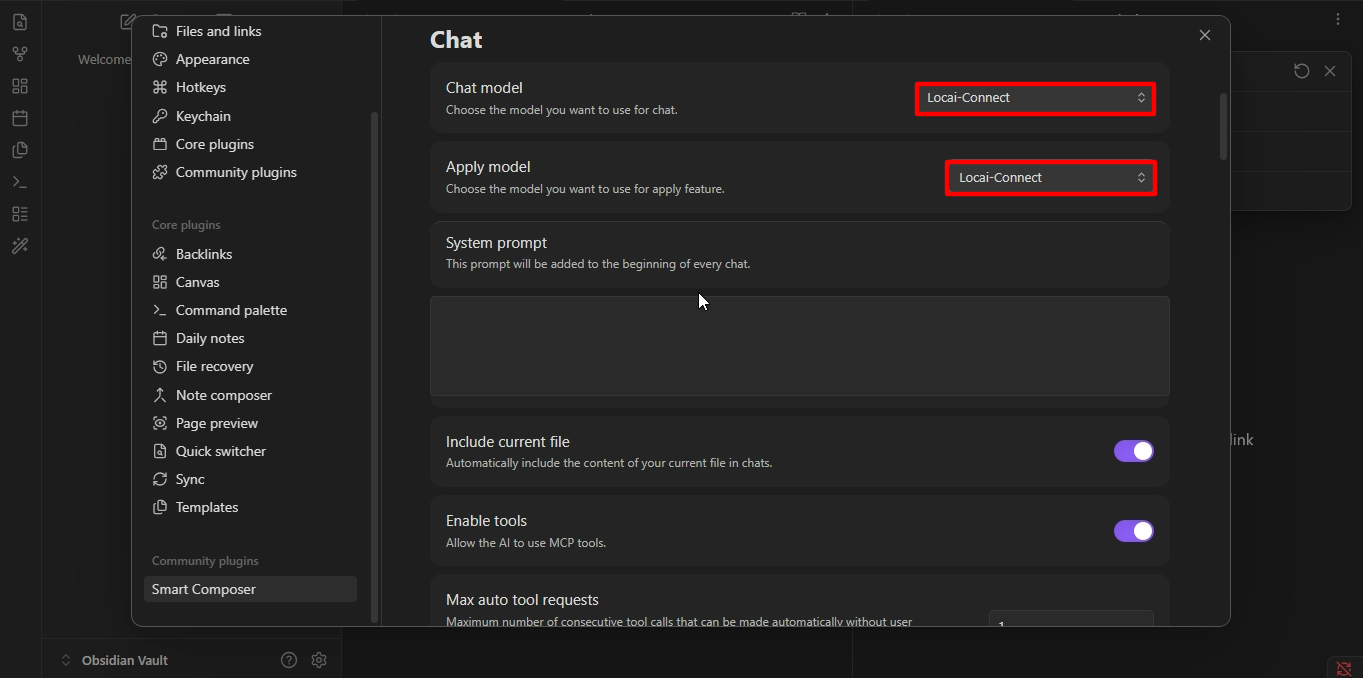
Step 13: In the Chat settings section, choose Locai-Connect for both the Chat model and Apply model options.
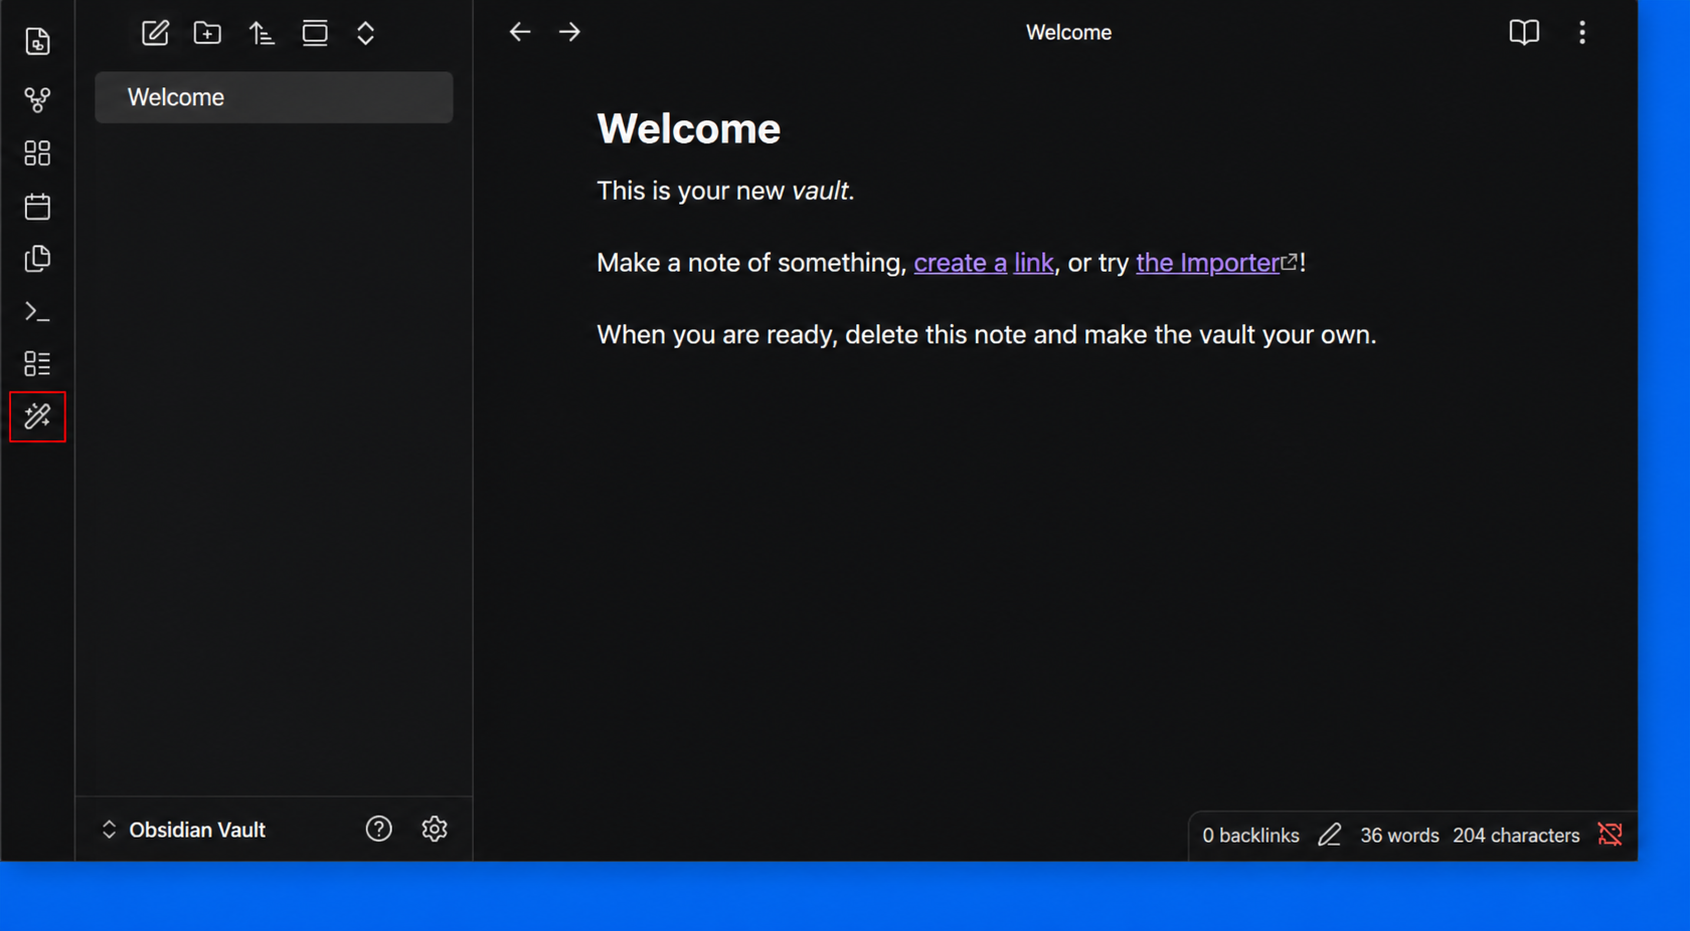
Step 14: Return to the main Obsidian workspace, then click the Smart Composer icon in the left sidebar to open the AI chat panel and start using Locai-Connect.
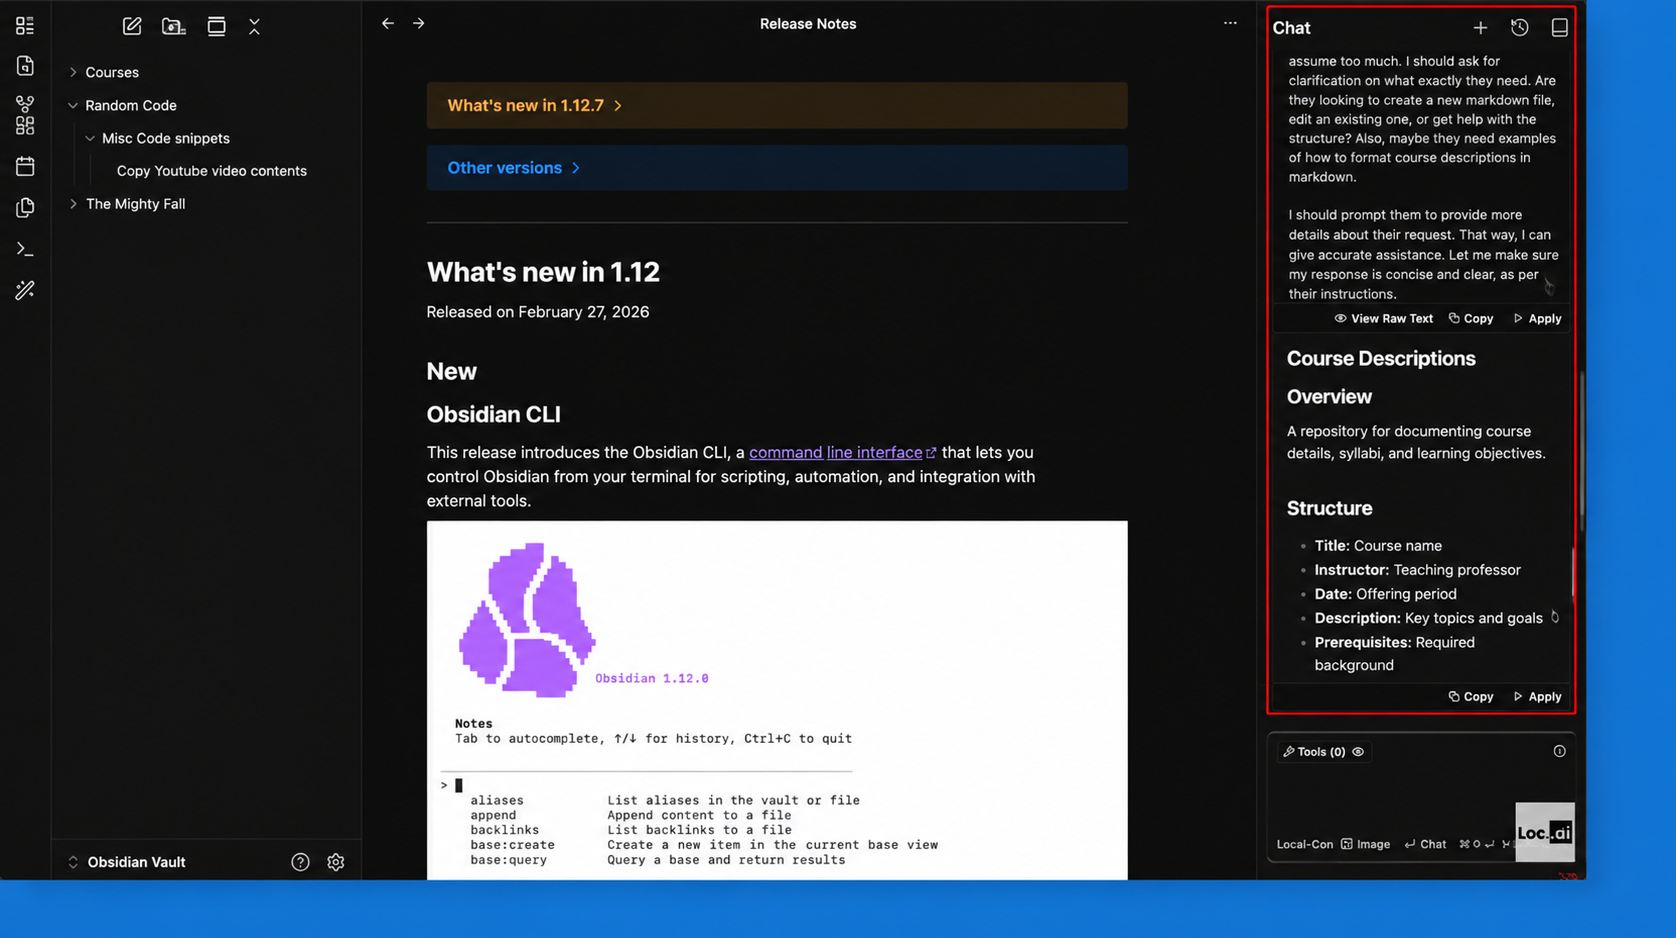
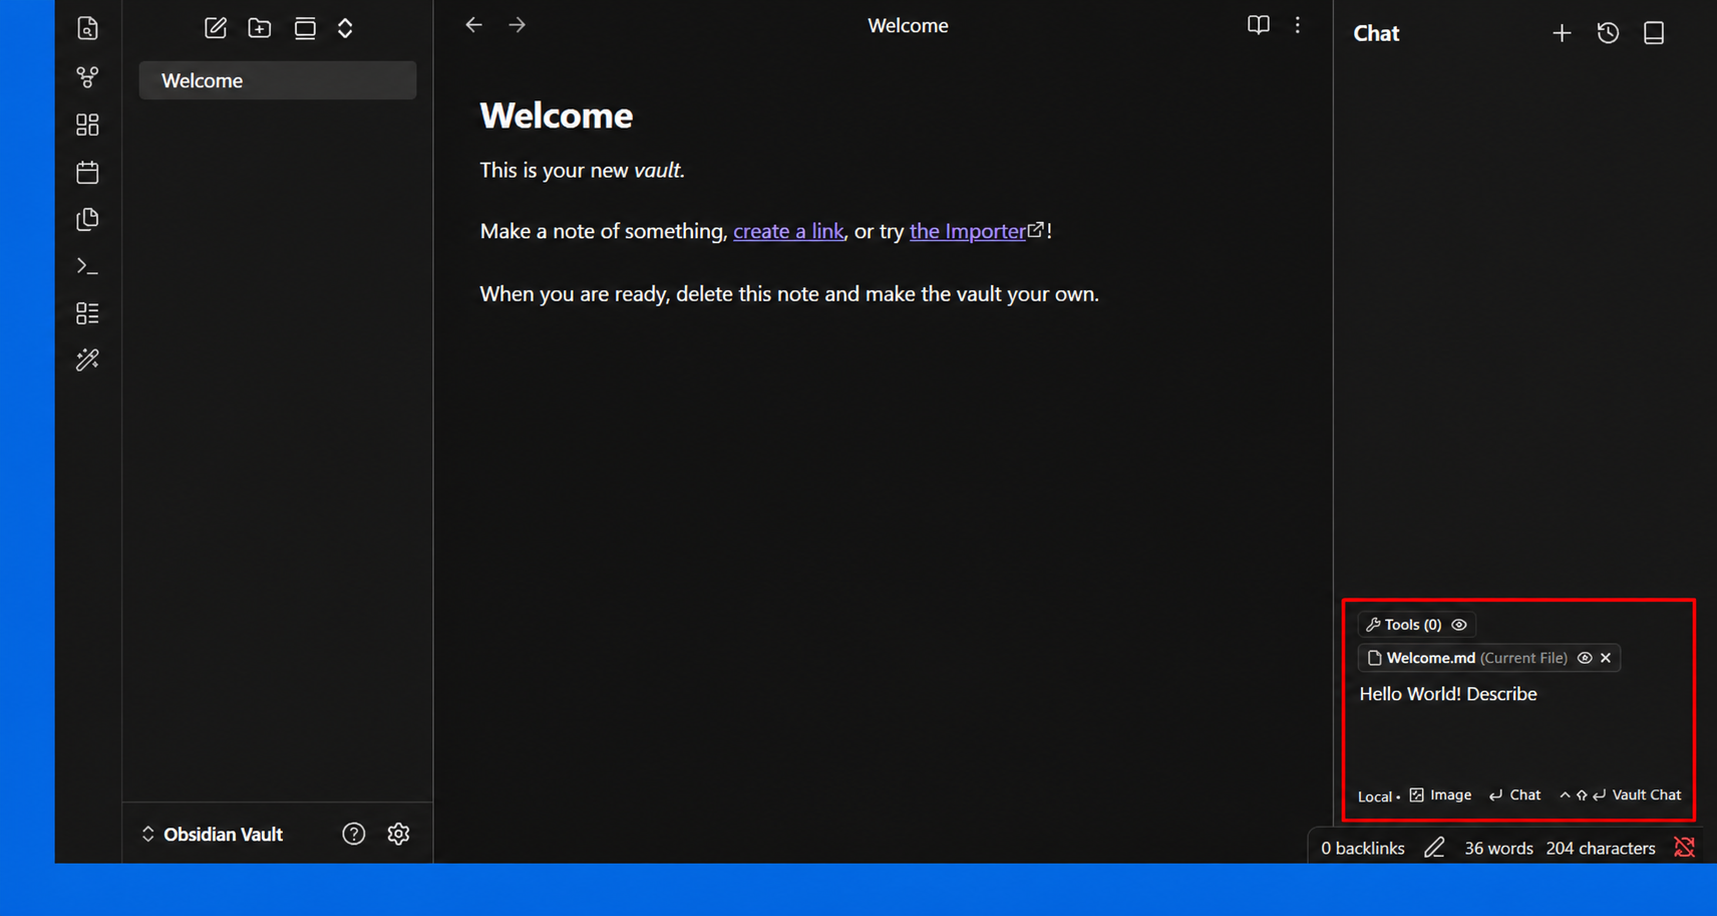
Step 15: The Smart Composer chat panel will open on the right side. Enter your prompt in the message box, then start chatting with Locai-Connect directly inside Obsidian.
Step 16: After submitting your prompt, Smart Composer will generate a response in the Chat panel. You can review the answer, then use options like Copy, Apply, or continue the conversation with follow-up prompts.