VS Code
Bring AI-assisted coding directly into your editor with chat, refactoring, code generation, and Tab Autocomplete.Power everything with models running on your own hardware through Loc.ai and the Continue extension.
Keep your development workflow fast, private, and fully under your control. Build without sending source code to external cloud services.
Why Use Loc.ai with VS Code?
Traditional AI coding tools often rely on cloud APIs, recurring costs, and sending code outside your environment.
Using Loc.ai changes that.
Benefits
- Run models on your own hardware
- Keep source code inside your network
- No cloud API fees
- Low-latency local inference
- Full control over models and performance
- Works with open-source coding models
What is Continue?
Continue is an open-source AI coding assistant for Visual Studio Code and JetBrains IDEs.
It adds AI features directly into your editor, including:
- Chat inside the sidebar
- Code explanation
- Refactoring assistance
- Inline code generation
- Tab Autocomplete
- Multi-model support
When connected to Loc.ai, Continue uses your locally deployed model instead of a cloud provider.
Integration Flow
The integration connects VS Code (Continue extension) to your locally hosted Loc.ai inference server via API calls. Your AI model processes requests locally and returns responses back to VS Code for coding assistance.
Prerequisites
Before you begin, make sure you have:
Before you begin, make sure you have:
- A Loc.ai account
- A registered device in Loc.ai
- Visual Studio Code installed
- Continue extension installed in VS Code
- A supported GGUF language model
Steps to Integrate with VS Code
Step 1: Refer to the Register a Device page to register your device with Loc.ai before continuing with the VS Code setup.
Once registered, the device status changes to Online in the dashboard.
Step 2: Once your device is registered, go to ML Models in the Loc.ai dashboard, upload a GGUF model or choose one from the model library, set the type to Language Model, then deploy the model to your registered device.
Once deployed, click Start Serving
Save the IP address and port shown in the serving panel you'll need both in step 3.
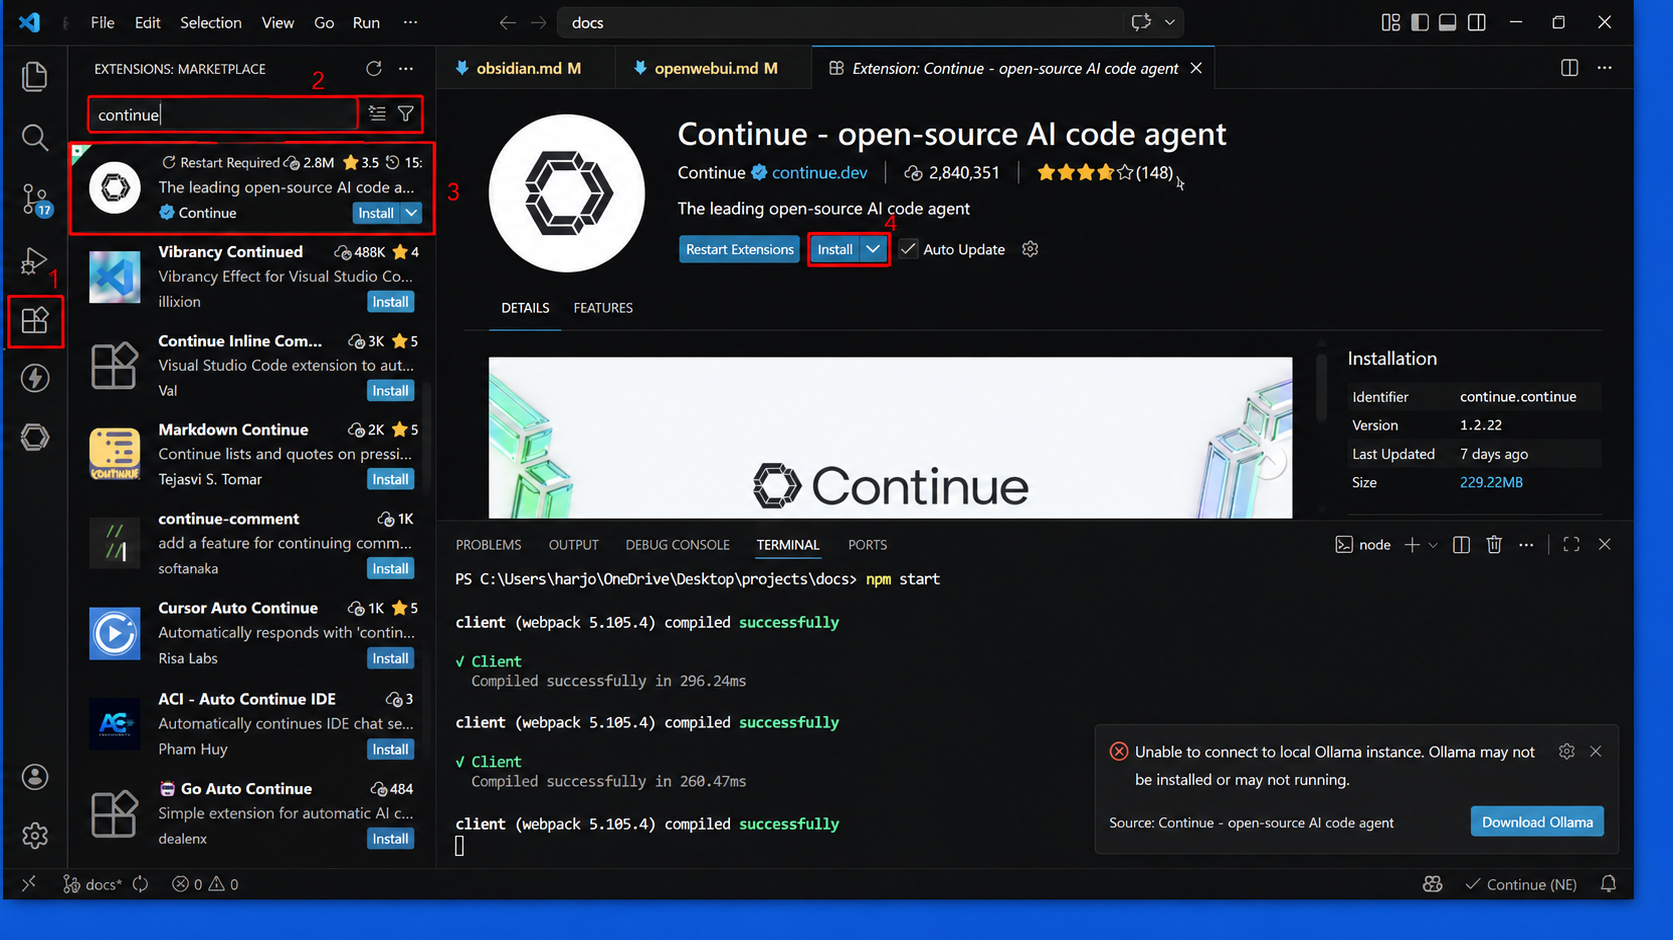
Step 3: Open Visual Studio Code, click the Extensions icon from the left sidebar, search for Continue, then install the Continue - open-source AI code agent extension.
Step 4: Follow the instructions below:
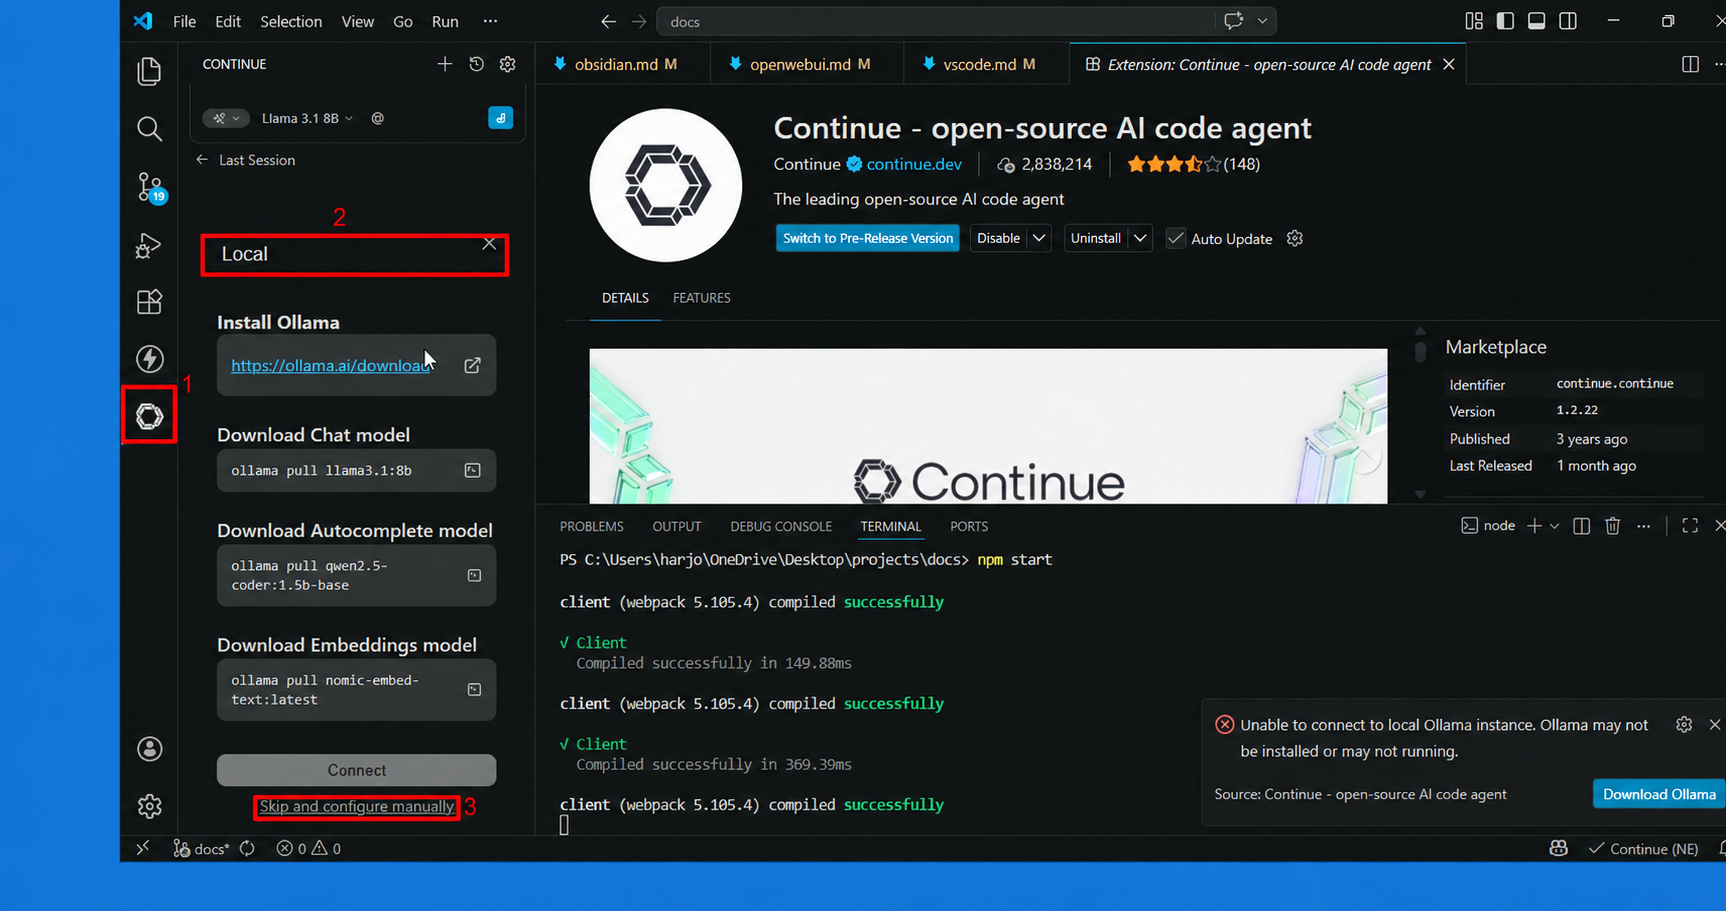
- Click the Continue icon from the left sidebar.
- Choose Locai from the dropdown in the Continue Extensions.
- Click Skip and configure manually to continue the local setup.
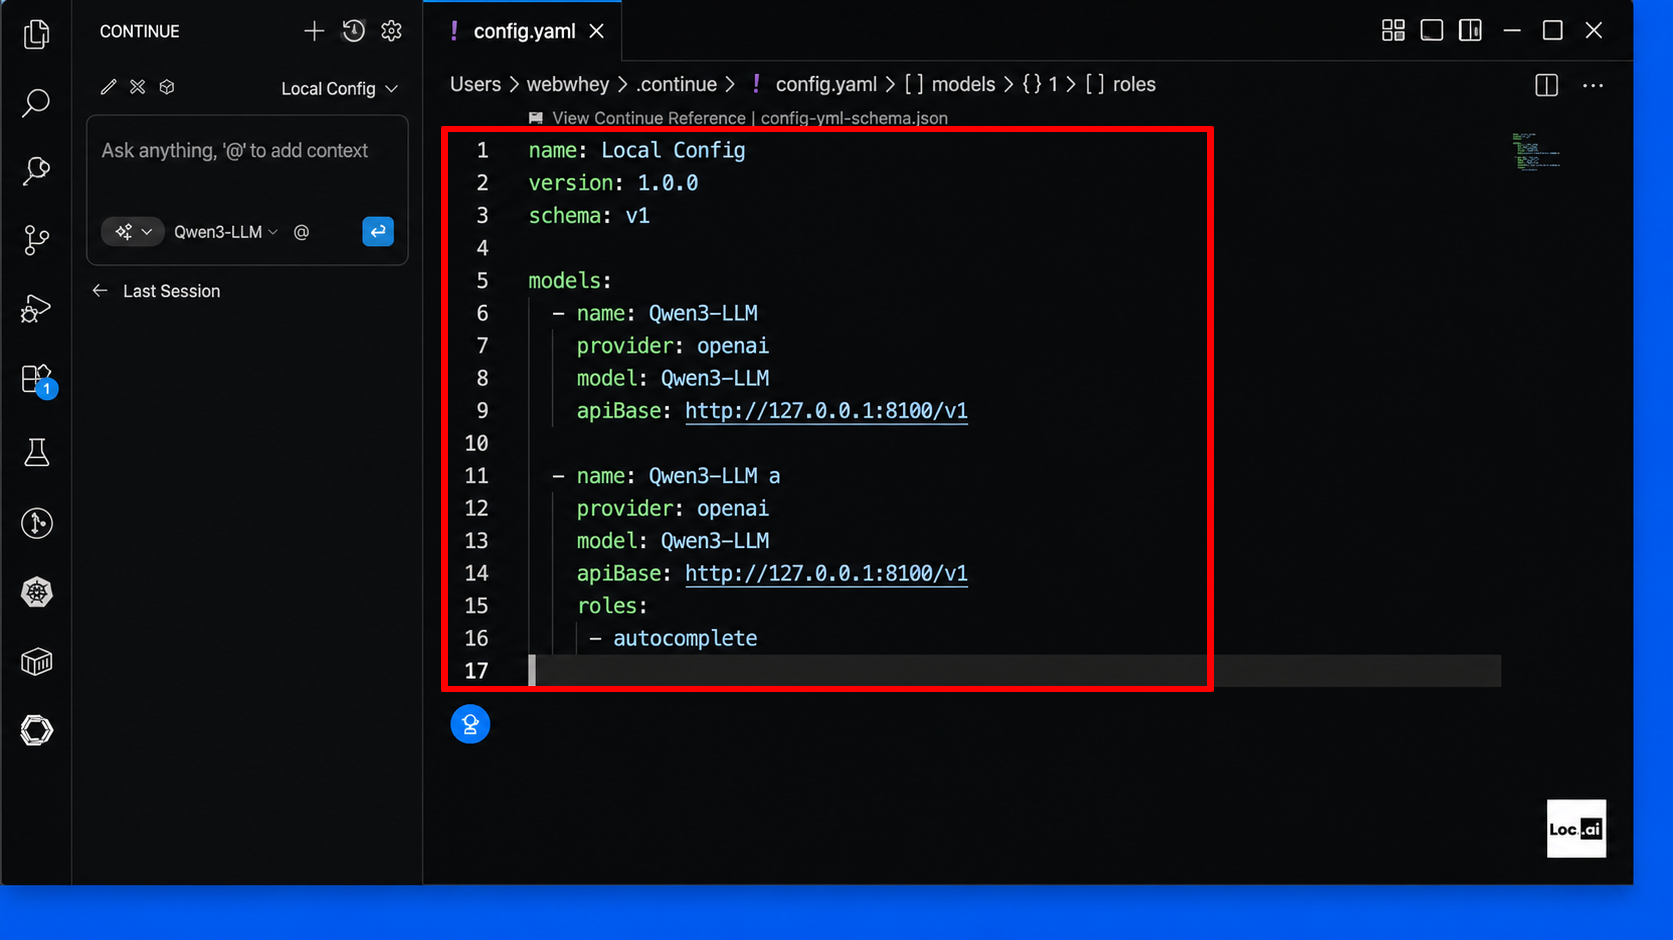
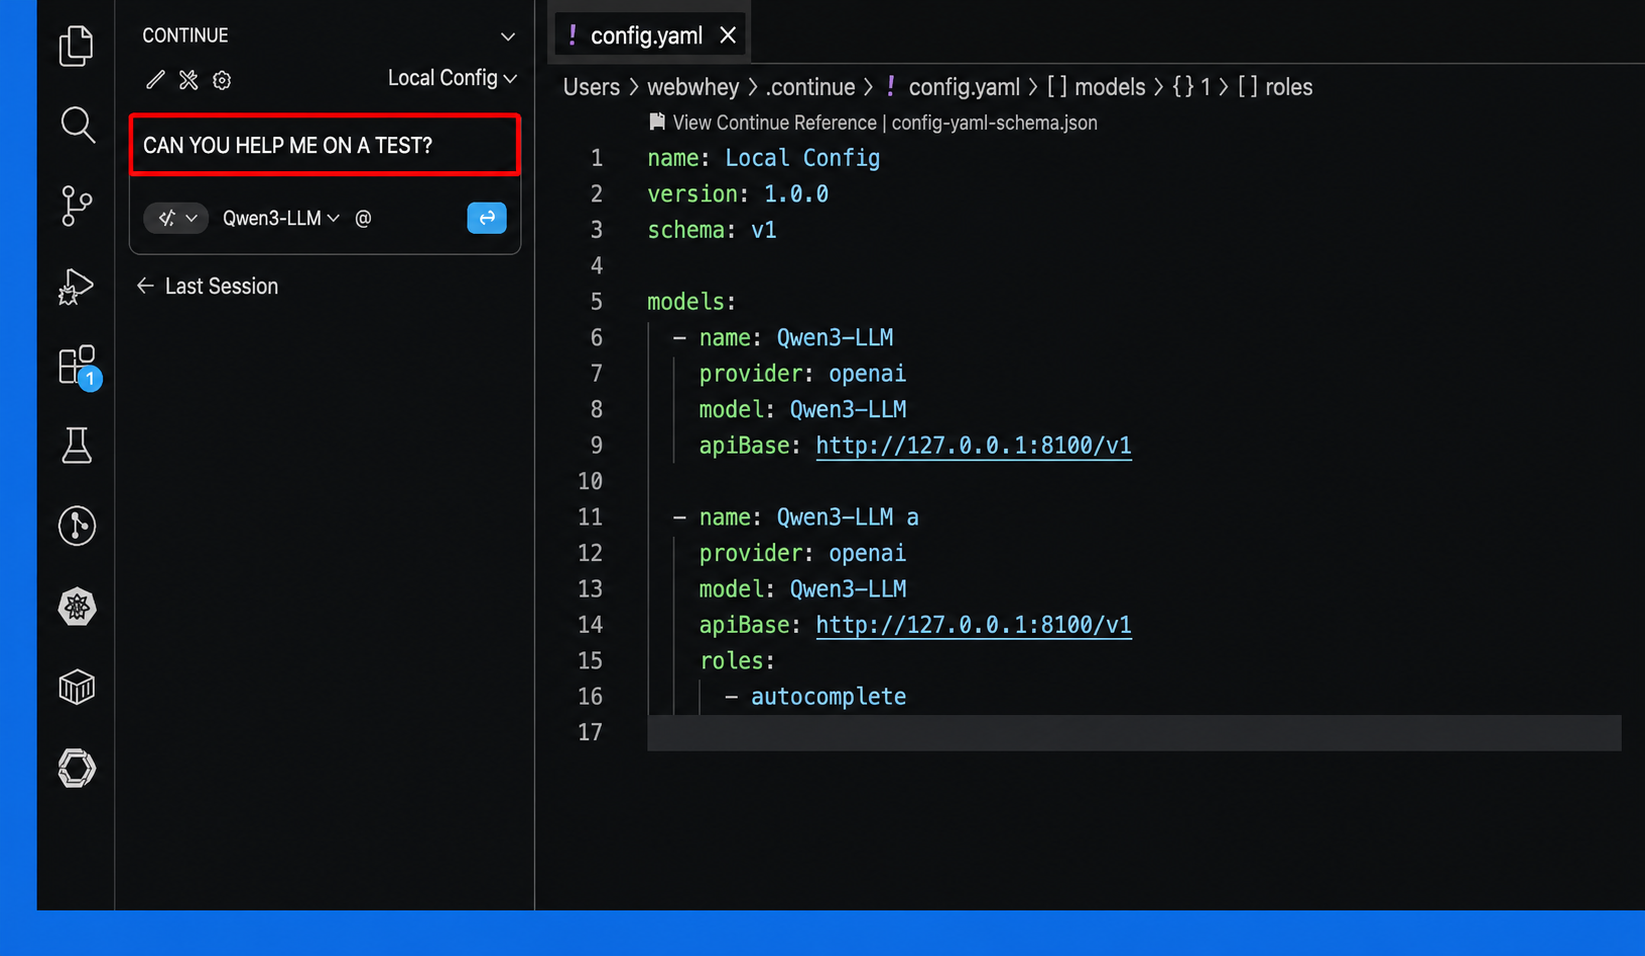
Step 5: In the generated config.yaml file, add your local model configuration details such as name, provider, model, and apiBase, then save the file to apply the setup.
version: 0.0.1
models:
  - name: chat_model
    provider: llama.cpp
    model: <YOUR_MODEL_NAME>
    apiBase: http://<YOUR_DEVICE_IP>:<PORT>/

  - name: autocomplete_model
    provider: llama.cpp
    model: <YOUR_MODEL_NAME>
    apiBase: http://<YOUR_DEVICE_IP>:<PORT>/
    roles:
      - autocomplete
Replace <YOUR_DEVICE_IP> and <PORT> with the values from the serving panel. You can use the same model for both roles, or serve a smaller model on a separate port for faster autocomplete.
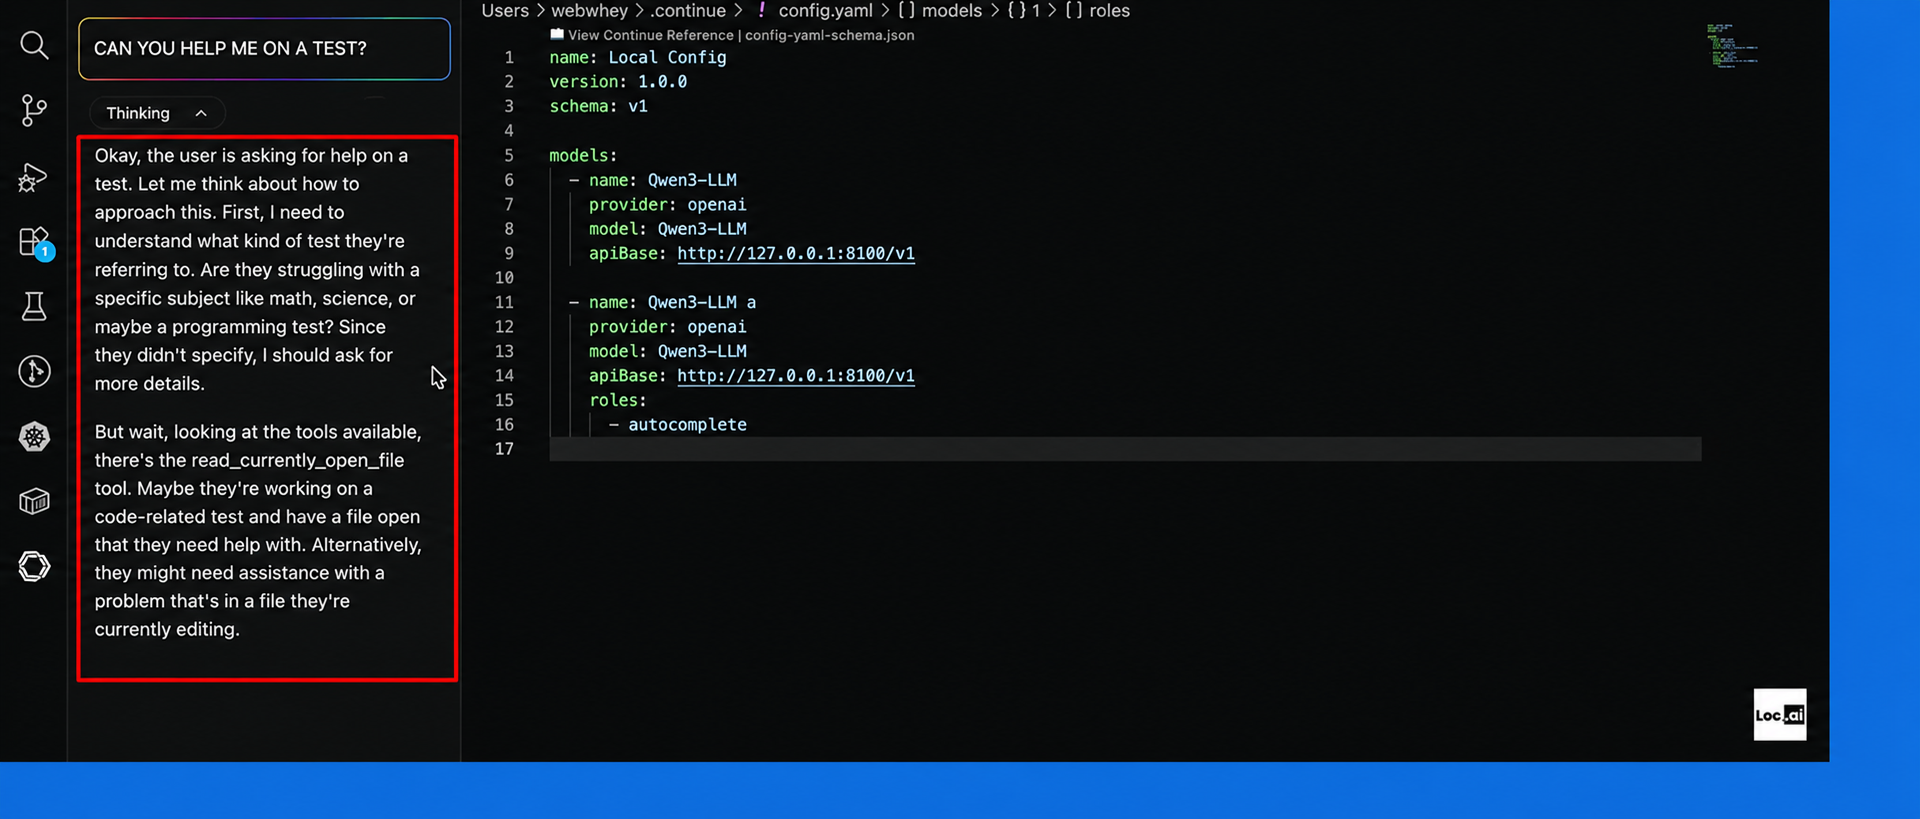
Step 6: Return to the Continue chat panel, type your prompt in the message box, then press Enter to start chatting with your locally configured AI model.
Step 7: The local AI model will process your request and display a response directly inside the Continue chat panel, allowing you to interact with it in Visual Studio Code.