macOS Install (Apple Silicon)
You don't have to visit GitHub to get the installer. A Download for Mac button appears in the Loc.ai Control web app — in the Setup Wizard, the Register Device dialog (under Desktop app), and the global top bar — and each downloads the same signed .pkg described below. This build is Apple Silicon (M-series) only and currently in Alpha; on an Intel Mac, use the headless install instead.
1. Download the installer
Go to the Releases page and download the desktop .pkg (locai-link-desktop-macos-arm64.pkg). It's signed and notarised, so macOS won't warn you about an unidentified developer.
Optional: verify the download against the release's checksums.txt:
shasum -a 256 --check --ignore-missing checksums.txt
2. Run the installer
Double-click the .pkg. macOS opens the standard installer wizard.
- Introduction. Click Continue.
- Destination. The installer writes to
/Library/Locai/(system-wide) plus/Applications/for the app. Click Install. - macOS prompts for your administrator password (this is macOS's own prompt for
/Library/write access, not part of Locai). Enter it and click Install Software. - Installation takes a few seconds. When it finishes, Locai Link launches and opens its first-run setup window automatically. You don't need to open anything manually.
As of 1.3.0 there is a single Locai Link app: setup, the menu-bar tray, and Preferences are all windows of the same app, managed by one background service.
An over-the-air upgrade from an older version switches to the new single-app, single-service layout immediately and asks once for your password to finish the change. Declining leaves the device on the new version and asks again next time. The old Setup Assistant app is removed automatically.
3. First-run setup
The setup window opens titled "Locai Link Setup" and walks you through four steps: Sign in, Models, Permissions, and Finish.
Step 1: Sign in
The setup asks you to sign in with your Locai account. Click Sign in with Locai.
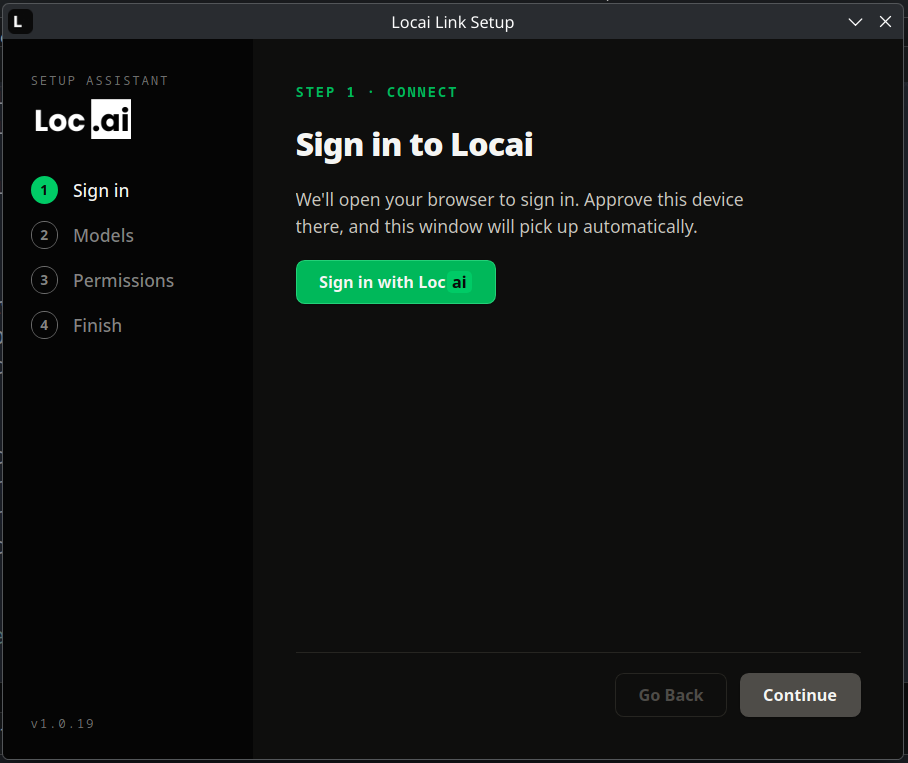
- A browser window opens automatically to a Locai sign-in page displaying a short code (e.g.
WXYZ-1234). - Sign in with your email + password (or Google, or Microsoft, whatever your account is configured for).
- The page asks "Approve this device?". Confirm. If the code shown on the web page matches the one shown in the setup window, you can approve.
- The setup detects the approval automatically within a few seconds and shows the signed-in account.
If the browser didn't open (some proxies block auto-launch), the setup shows the URL and code so you can enter them manually on any device with a browser.
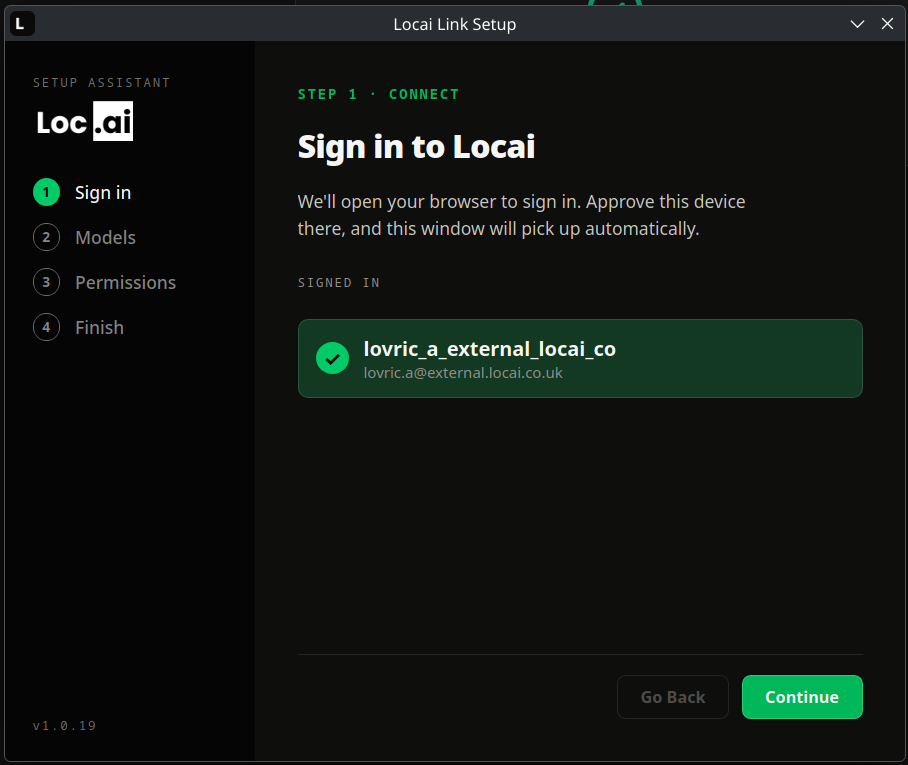
Once your account appears under Signed in, click Continue.
Step 2: Models
You'll see a list of models on your Locai account that this device can run, with a recommended default highlighted. Tick the ones you want to send to this device now, or leave them all unticked and deploy later; you can change the selection later from Control or the app's Preferences.
Each row shows the model name, its model type, its framework (for example GGUF for language models, TensorFlow Lite for audio and image classifiers), and its size on disk after download.
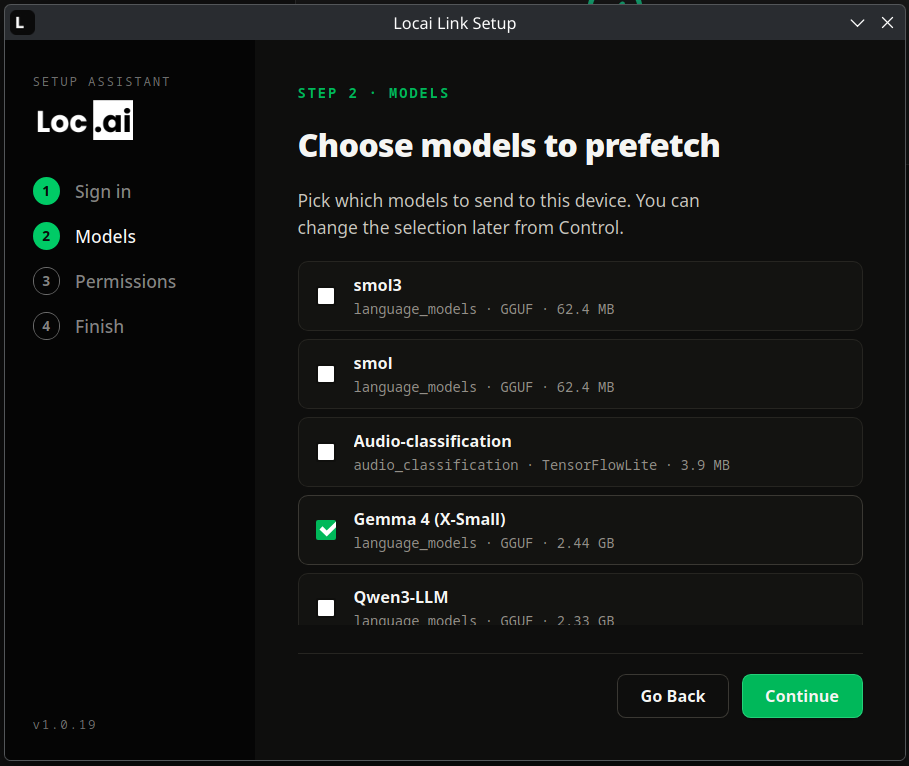
The models you pick here are queued for the agent to download once setup completes. Downloads run in the background, so you don't have to wait on this step.
Click Continue.
Step 3: Permissions
The setup asks whether Locai Link should start at login. Leaving this on (recommended) means the agent and tray run in the background from the moment you log into your Mac. Turning it off means you'd need to launch Locai Link manually from Applications each time. You can change this at any time from Locai Link Preferences.
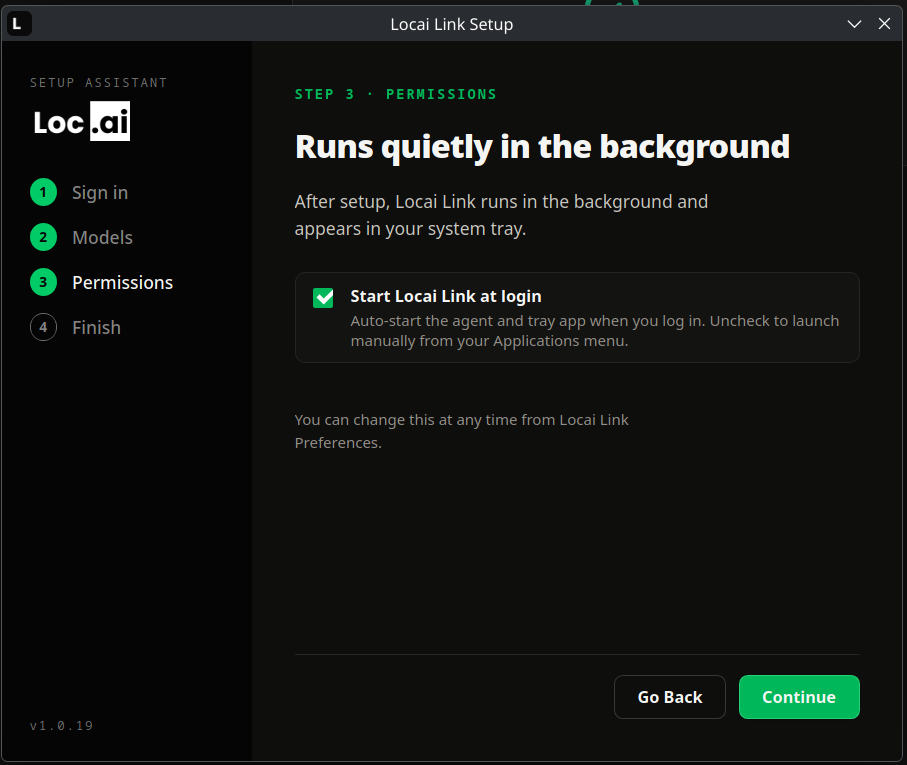
Click Continue.
Step 4: Finish
Click Complete setup. Locai Link enrols this machine on your Locai account and drops the initial config in place, using a registration key it mints on your behalf. This takes a couple of seconds.
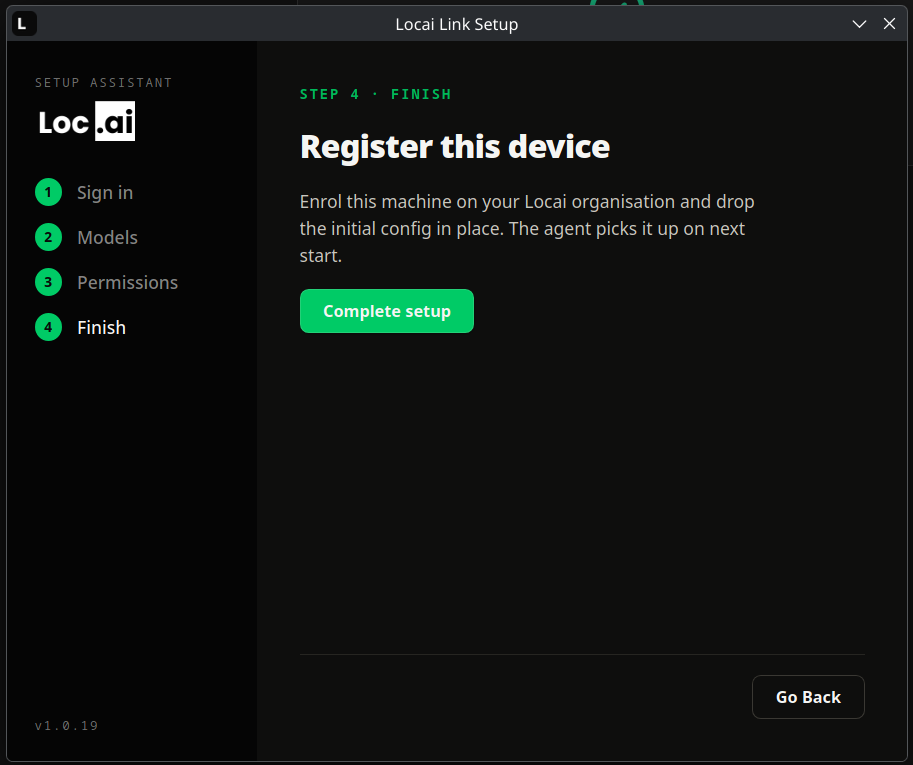
If something fails (network error, expired key, etc.), a specific error appears with a Retry button. Common issues:
- Network blocked. Check that your machine can reach
api.locai.co.ukon HTTPS. - Registration key expired. Click Retry to mint a fresh one.
When registration succeeds, the step shows All set with your new device ID, confirms where the config was written, and notes how many models were queued for this device.
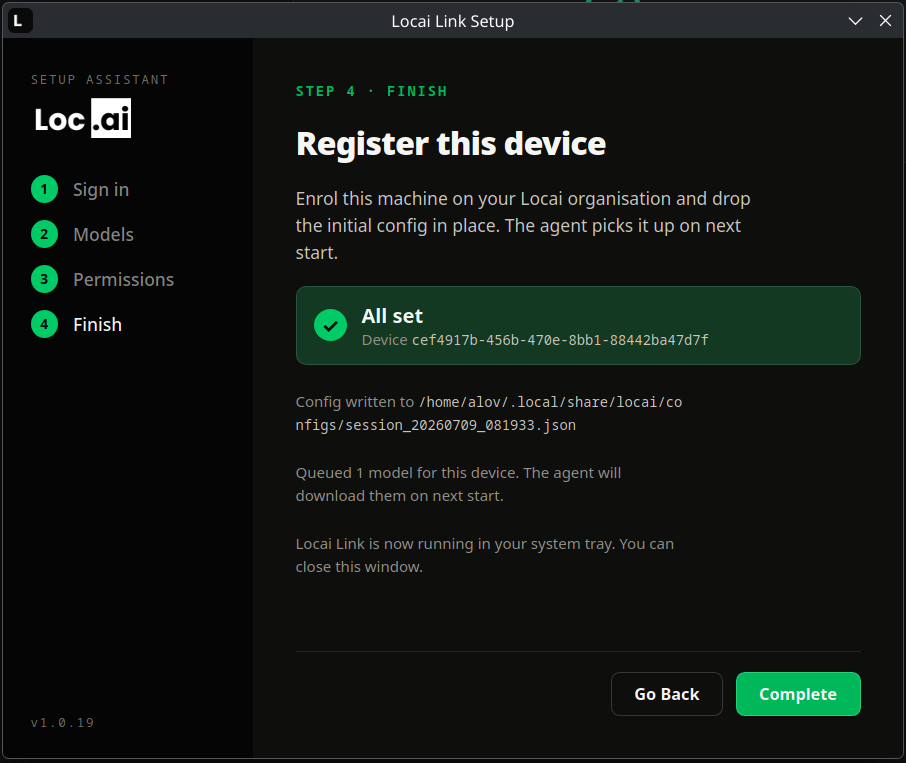
Click Complete to close the setup window.
- The Locai Link menu-bar icon appears in the top-right of your menu bar.
- If you selected models in Step 2, the tray icon will show download progress within a few seconds.
It's not a dead end. The menu-bar icon offers Continue Setup… to reopen the wizard, and Uninstall Locai Link… if you've changed your mind.
That's it. The device is now enrolled and running. Continue to Using the companion.